Keeping your system secure is essential, and Debian makes it easy to stay protected with automatic security updates.
In this guide, we’ll walk you through the simple steps to set up your Debian system so it takes care of security updates for you, automatically!
Table of Contents
Why Enable Automatic Security Updates?
You’re busy working or enjoying your day, and you don’t have time to manually check for security updates. Meanwhile, new vulnerabilities could be putting your system at risk.
By enabling automatic updates, you can:
- Stay secure without constant monitoring.
- Save time by letting your system handle updates.
- Enjoy peace of mind, knowing your system is always protected.
Regular security updates patch vulnerabilities that could otherwise be exploited by attackers, which is especially important for servers and systems exposed to the internet, where threats evolve constantly.
Step 1: Update Your Debian System
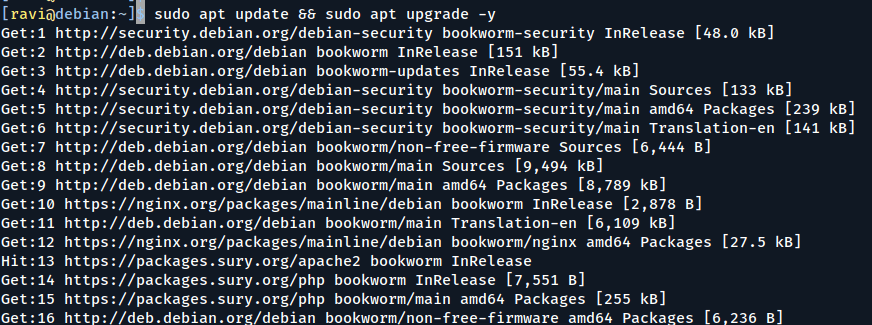
Before making any changes, make sure to run the following apt command to update the package lists and upgrade any outdated packages, which is important to keep your system up to date before enabling automatic updates for a smooth configuration process.
sudo apt update && sudo apt upgrade -y
Step 2: Install the Unattended-Upgrades Package
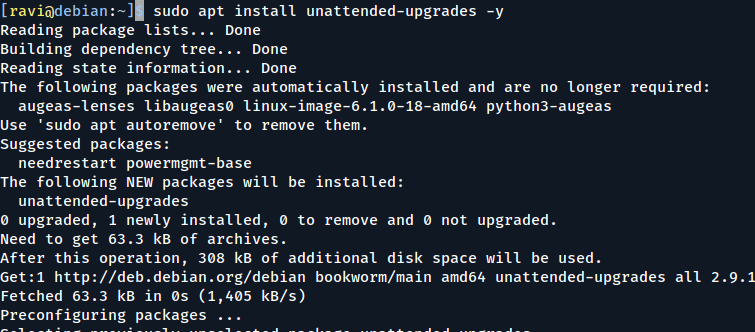
Debian has a handy tool called unattended-upgrades, which is specifically designed to handle downloading and installing updates without user intervention, which is lightweight and works seamlessly in the background.
sudo apt install unattended-upgrades -y
Step 3: Enable Automatic Updates on Debian
Once installed, enable automatic updates with the following command, which will prompt asking if you want to enable automatic updates. Select Yes and press Enter, which will confirm that the unattended-upgrades service is active and ready to manage updates for you.
sudo dpkg-reconfigure unattended-upgrades

Step 4: Schedule Automatic Updates on Debian
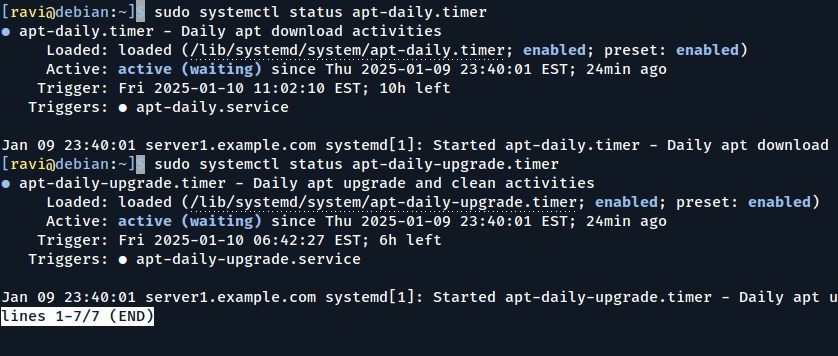
By default, unattended-upgrades runs daily, to verify or modify the schedule, check the systemd timer:
sudo systemctl status apt-daily.timer
sudo systemctl status apt-daily-upgrade.timer
Both timers should be active, if not, activate them with:
sudo systemctl enable --now apt-daily.timer
sudo systemctl enable --now apt-daily-upgrade.timer
These timers ensure that updates are checked and applied regularly, without manual intervention.
Step 5: Test Automatic Updates on Debian
To ensure everything is working, simulate an unattended upgrade:
sudo unattended-upgrade --dry-run
This command shows what would happen during an automatic update, without actually making changes. It’s a good way to confirm that your configuration is correct and updates will be applied as expected.
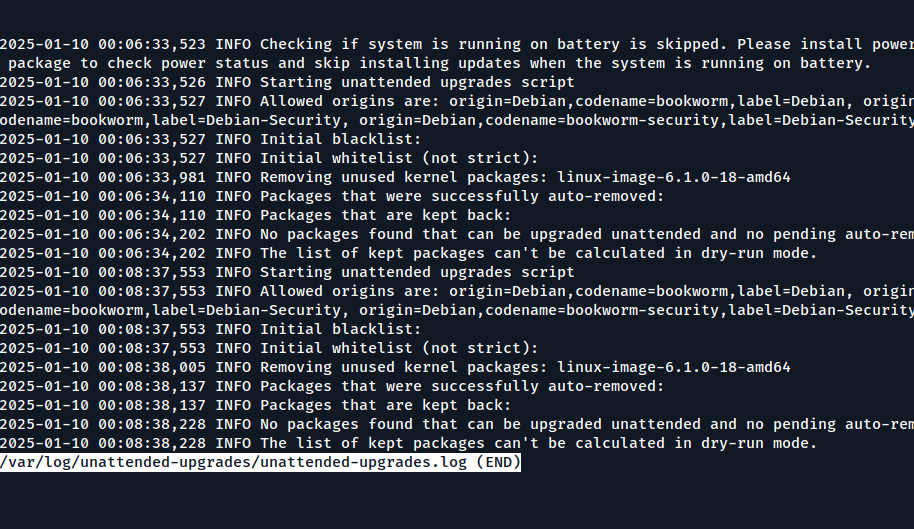
You can monitor automatic updates by checking the logs.
sudo less /var/log/unattended-upgrades/unattended-upgrades.log
This log shows details of installed updates and any issues that occurred. Reviewing logs periodically can help you ensure that updates are being applied correctly and troubleshoot any problems.
Advanced Configuration Options
If you’re a power user or managing multiple systems, you might want to explore these additional settings in the configuration file:
sudo nano /etc/apt/apt.conf.d/50unattended-upgrades
Configure unattended-upgrades to send you an email whenever updates are installed.
Unattended-Upgrade::Mail "[email protected]";
Enable automatic reboots after kernel updates by adding this line:
Unattended-Upgrade::Automatic-Reboot "true";
You can also schedule reboots at a specific time:
Unattended-Upgrade::Automatic-Reboot-Time "02:00";
Specify packages you don’t want to be updated by editing the Unattended-Upgrade::Package-Blacklist section in the configuration file.
Configure download limits if you’re on a metered connection by setting options in /etc/apt/apt.conf.d/20auto-upgrades.
Conclusion
That’s it! With these steps, your Debian system will automatically handle security updates, keeping your system secure without you having to do a thing. You’ve now set up a reliable way to ensure your system stays protected from vulnerabilities.


