Next.js is a well-known framework for React that helps you create fast and modern websites, which is easy to use and has powerful features like server-side rendering, creating static pages, and building APIs.
If you’re looking to start a Next.js project on your Ubuntu-based systems, this guide will walk you through the process step-by-step.
Table of Contents
Prerequisites
Before you begin setting up a Next.js project, there are a few things you’ll need to install on your Linux system, which include:
Node.js: Next.js is built on top ofNode.js, so you need to have Node.js installed.npm: npm (Node Package Manager) is used to manage the packages and dependencies for your project.
Let’s go through the installation process for both Node.js and npm.
Step1 1: Install Node.js and NPM in Linux
Before installing any new software, it’s a good idea to update your package list to make sure you’re installing the latest version of the software available in the repositories.
sudo apt update
Next, you can install Node.js (also installs npm), which is best to install the version of Node.js that is marked as LTS (Long-Term Support), as it’s the most stable and widely used version.
sudo apt install nodejs
After the installation is complete, verify that Node.js is installed correctly by checking its version:
node -v
npm -v
Now you have both Node.js and npm installed on your system.
Step 2: Install and Set Up Next.js Project
Now that you have Node.js and npm installed, it’s time to create a new Next.js project. The easiest way to install Next.js is by using create-next-app, which is an official package provided by the Next.js team.
sudo npm install -g create-next-app
Now that create-next-app is installed, you can create a new Next.js project.
npx create-next-app@latest my-next-app
Here, my-next-app is the name of your project folder. You can replace it with any name you prefer. The npx command will download and run the create-next-app package, and it will set up a new Next.js project for you.
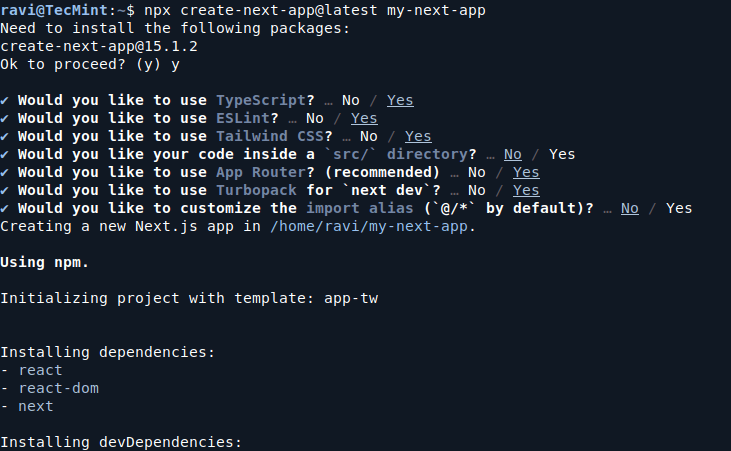
Once the command finishes running, you’ll have a new folder called my-next-app with the basic structure of a Next.js application.
Step 3: Run Your Next.js Project
After the project is created, go into your project folder and start the development server:
cd my-next-app
npm run dev
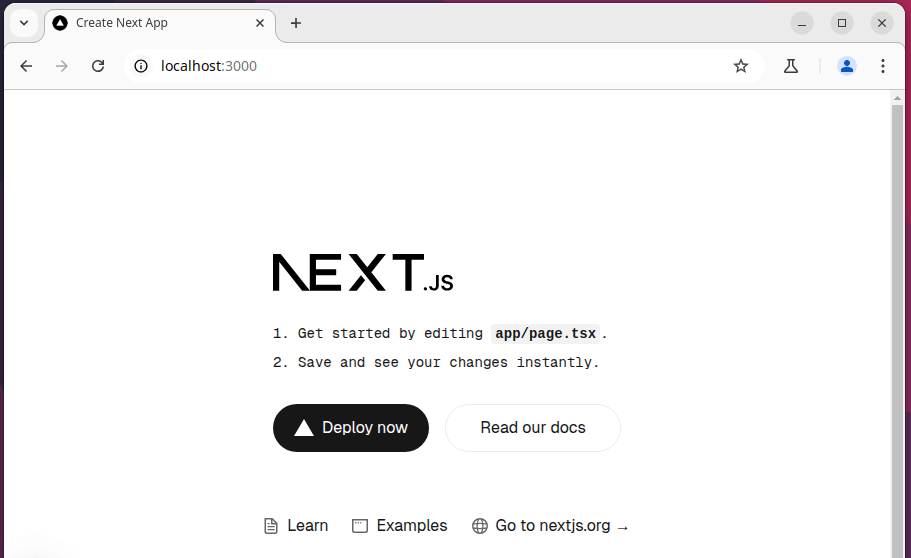
This command will start the Next.js development server. By default, the server will run on http://localhost:3000.

Open your browser and go to that URL, and you should see the default Next.js welcome page.
You can start creating new pages in the app folder. For example, create a new file about.js inside the app directory to create an About page.
Conclusion
You’ve successfully set up a new Next.js project on your Ubuntu machine! Now you can start building your web application by adding new pages, components, and features.
Next.js makes it easy to build modern web applications, and with the help of this guide, you’ve learned how to install and set up a Next.js project.

