If you are a regular user of Spotify, you can customize the look, feel and behavior of Spotify application on Linux.
The open source project Spicetify lets you add a ‘marketplace’ feature to your Spotify app from where you can install extensions and themes.
For example, you can autoskip videos, hide podcasts entirely, compare playlists and much more. With themes, you can have a different looking interface.
It is primarily a CLI tool but apart from installation and activation, you don’t really have to do much in CLI. You can enjoy the extensions directly from Spotify app.
In this tutorial, I’ll show the steps for installing Spotify on Ubuntu and Debian-based distributions.
📋
Table of Contents
Installing Spicetify on Ubuntu
The entire Spicetify installation comprises of:
- Ensuring Spotify deb version installation
- Giving correct permission on Spotify folders
- Using a script to install Spicetify
Let’s see the steps in detail.
Step 0: Remove Snap version of Spotify and get the debian version
Spicetify does not work with the Snap application. Check if you have snap version of Spotify installed on your Ubuntu system with:
snap list | grep spotifyIf you don’t see any output, you are good.
Else, remove the Snap version of Spotify with:
sudo snap remove spotifyAfter that, install the deb version of Spotify on Ubuntu. Ensure that you have curl installed:
sudo apt install curlAnd then get the repository key and add it to your system:
curl -sS https://download.spotify.com/debian/pubkey_6224F9941A8AA6D1.gpg | sudo gpg --dearmor --yes -o /etc/apt/trusted.gpg.d/spotify.gpgNext, add the Spotify repository details. This way, you’ll be getting the Spotify package as well as future updates on it along with regular system updates.
echo "deb http://repository.spotify.com stable non-free" | sudo tee /etc/apt/sources.list.d/spotify.listAnd now, install Spotify:
sudo apt-get update && sudo apt-get install spotify-clientStep 1: Prepare for installation
Since Spicetify adds extensions and themes, it needs to access the directories where Spotify files are stored. Spicetify documentation recommends changing permissions for those directories.
Do that by running these two commands one by one:
sudo chmod a+wr /usr/share/spotify
sudo chmod a+wr /usr/share/spotify/Apps -R
Next, run the Spotify app and make sure that you are logged in.
If you don’t do that, you’ll see the “Could not detect “prefs” file location” error later on.
error Could not detect "prefs" file location.
success Default config-xpui.ini generated.
error Cannot detect Spotify "prefs" file location. Please manually set "prefs_path" in config-xpui.ini
Step 2: Start Spicetify installation
✋
Again, ensure that you have Spotfiy app running and you are logged into it.
Now, all you have to do is fetch the official installation script and run it:
curl -fsSL https://raw.githubusercontent.com/spicetify/cli/main/install.sh | shIt starts downloading the file and running it. At one point, it will ask if you want to install spicetify marketplace. Press enter to confirm it.
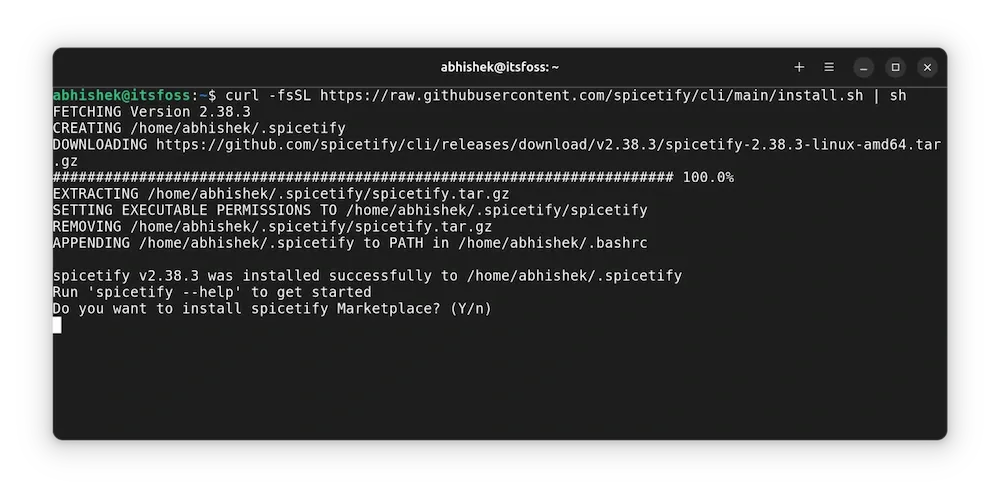
Press enter to install spicetify marketplace and the process continues.
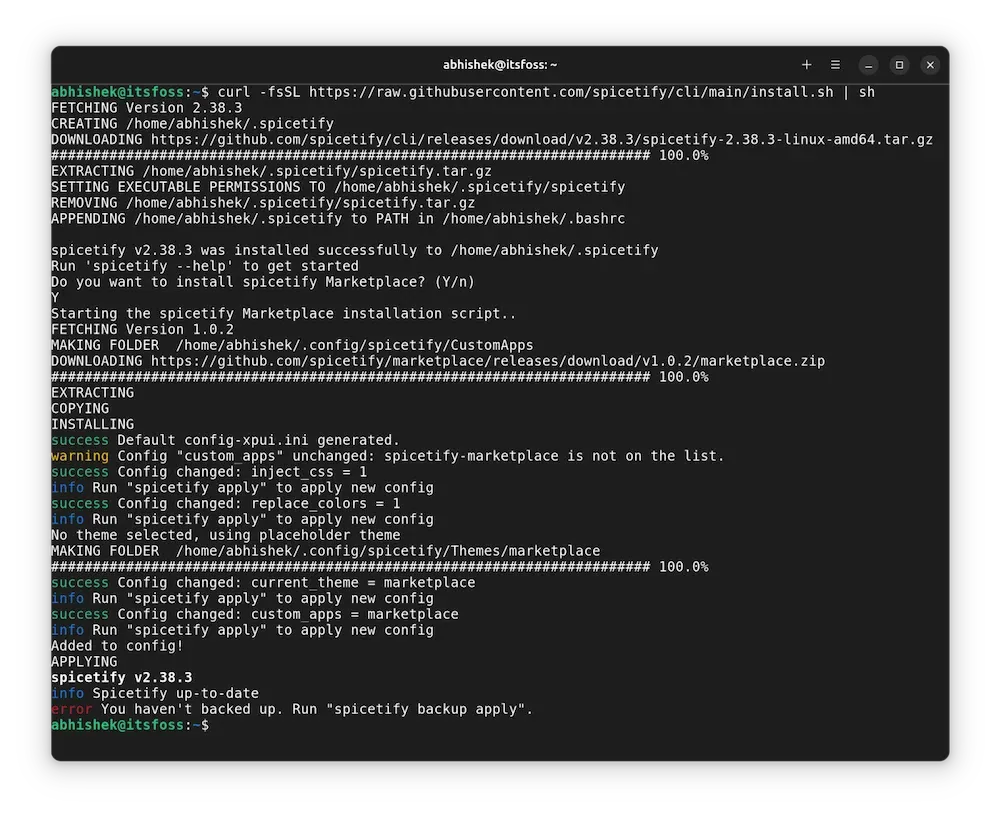
At the end of the entire thing, you’ll see an “error message” that “You haven’t backed up. Run “spicetify backup apply”.
It’s not really an error and you should not just run ‘backup apply’ immediately. If you try to do that, it will show an error that “spicetify command not found”. That’s because spicetify is only recognized after the terminal session starts.
That’s okay. We handle it in the next step.
Step 3: Finishing up the installation
🚧
Restart your terminal.
Once you have restarted the terminal, run the following command:
spicetify backup applyAfter this, Spotify restarts automatically. You can now see the marketplace option on the Spotify interface.
Click on it and you shall see the option to install extensions, themes, snippets etc. Hover over an item and you’ll see the “install button”.
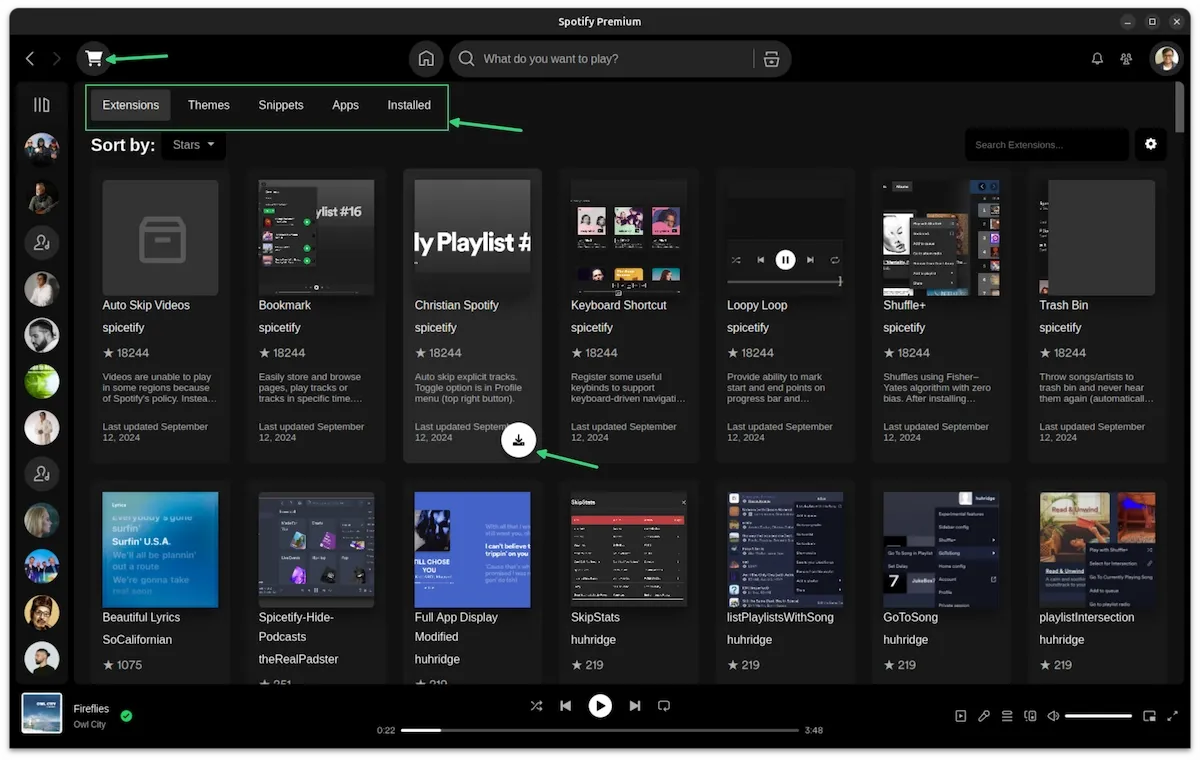
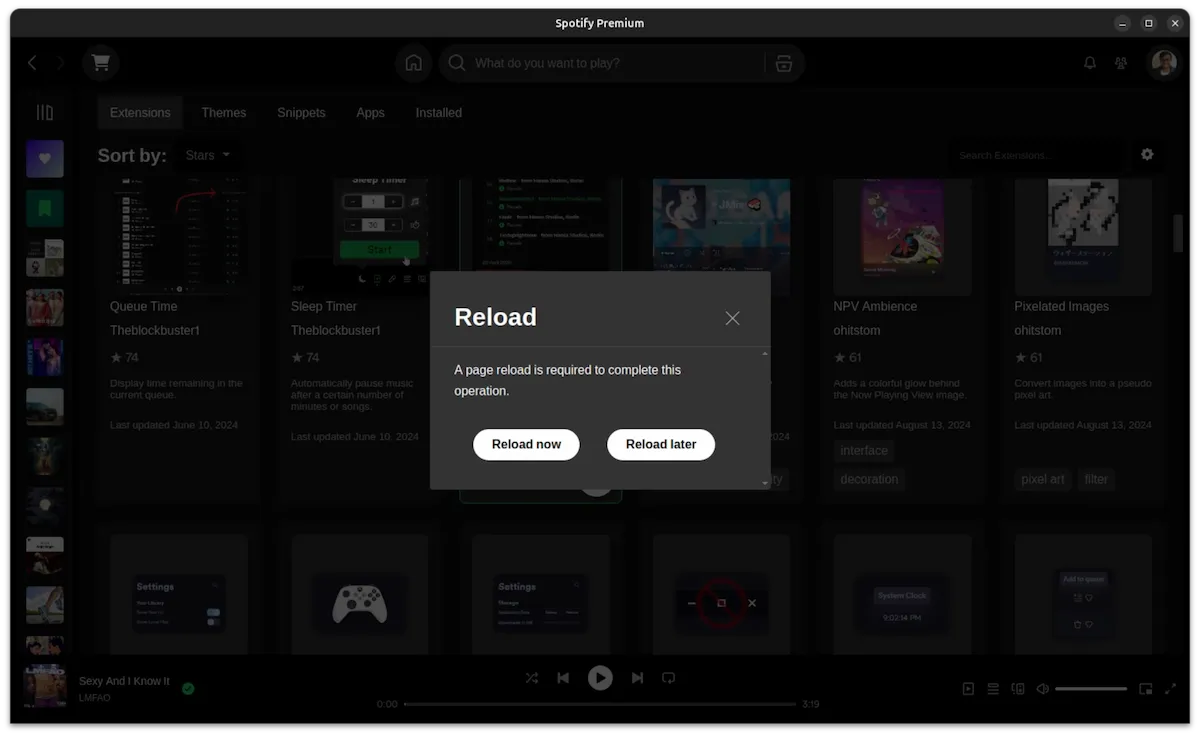
When you click the install button, it is installed immediately and you’ll be asked to reload Spotify:
Congratulations! You can start enjoying Spicetify and customize your Spotify experience now.
Few tips on using the Spicetify marketplace
Let me share a few tips from my Spicetify experience that should also help you.
Choose your extensions wisely
By default, the extensions are displayed based on number of stars they have. This is already a good thing as it indicates that the extension should work properly.
Not all extensions will work flawlessly, some might impact the Spotify app performance and user experience. For example, I installed a theme and it changed the interface and header menu was gone and I could not even access the market place or any other option. It can be reset which I discuss in later section.
You should use extensions that have been recently updated and have good number of stars.
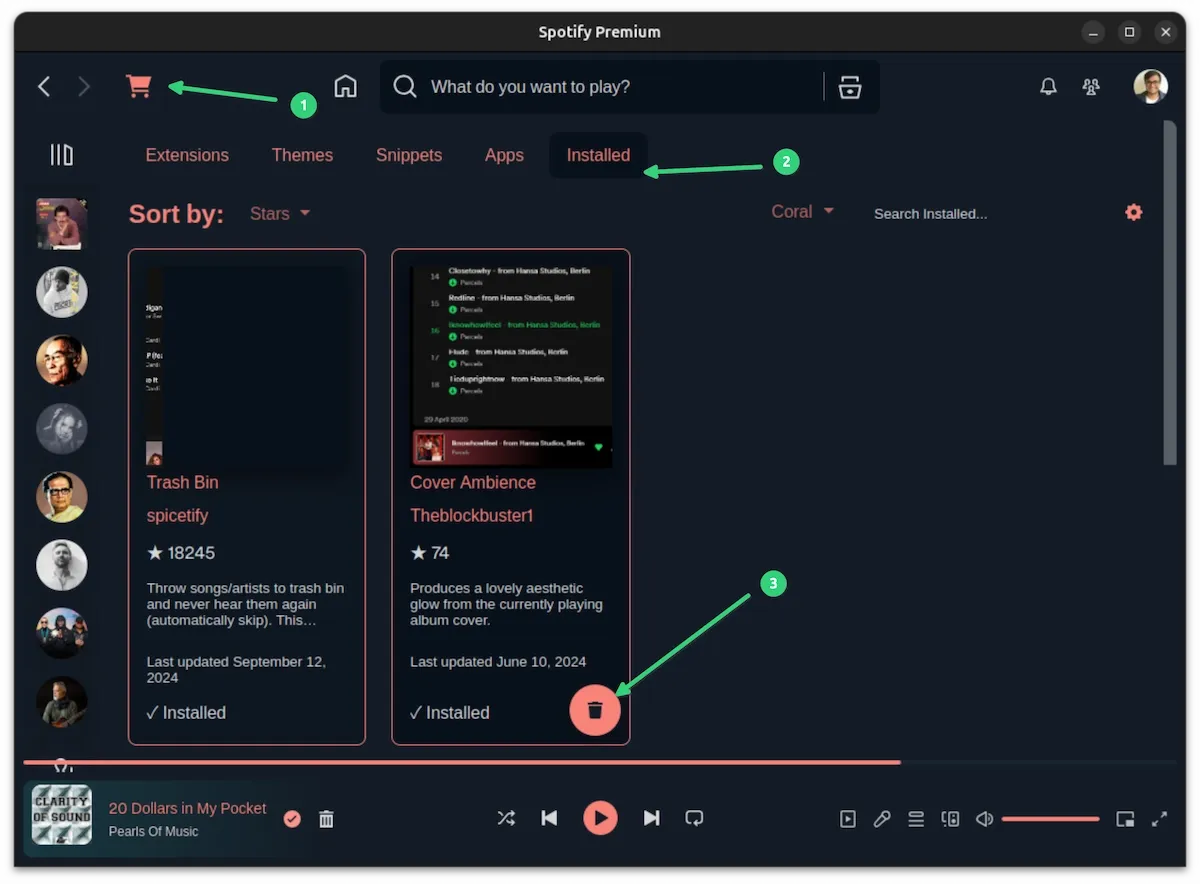
Don’t install too many extensions unnecessarily. Remove the ones you don’t need.
Theme it right, theme it once
Only one theme can be installed and used at a time. And as soon as you install a theme, the previous one is no longer in installed state. Some themes have several color variants, though.
Messed it up? Restore it
It is not impossible to mess things up. The good thing is that you can restore the default Spotify looks with:
spicetify restoreIf you want to reuse Spiectify, apply it again:
spicetify applyUpdate Spicetify
It is a good idea to keep Spiectify updated, especially when you are updating Spotify. You can do this with:
spicetify update
spicetify upgrade
Removing Spicetify
To uninstall Spicetify, you should first restore the default looks:
spicetify restoreAnd then remove the Spicetify files:
rm -rf ~/.spicetify
rm -rf ~/.config/spicetify
Conclusion
Spicetify is something good to have if you want greater control over your music experience. Don’t like songs with vulgar lyrics, block them all with an extension. Hate an artist, block them from any automated playlist.
Compatibility can always be a concern and the restore feature helps a great deal.
As far as the security concern, I cannot give a 100% yes or no. Spicetify is open source and so are all the extensions and themes. Of course, it is not possible to have a security check on all of them all the time.
Spicetify is installed without sudo permission and it has limited permission with read-write permissions to Spotify folders only. In theory, it should not impact anything other than Spotify on your system.
Also, Spicetify works on client-side. Meaning, everything happens on your computer, not in your Spotify account. If you install Spotify on any other device, Spiectify changes won’t be there.


