Welcome to another blog post on NSX Application Platform (NAPP). Over the last few weeks, I have been publishing multiple articles around NSX Application platform covering both manual and automated deployment using the NAPP Automation Appliance. While the articles were written based on pre-NSX 4.2 versions, I hope you might have noticed that one of the requirements for a successful NAPP deployment is to have direct internet access on the NSX manager nodes and the TKGS workload network and if not, the option would be to have an offline NAPP deployment with a private Harbor registry.
NSX 4.2 released many enhancements around NAPP and most importantly, it introduced support for NAPP deployment with an HTTP/HTTPS web proxy using the NAPP automation appliance. The NAPP automation appliance automates the proxy configuration on the TKGS guest cluster that it deploys, performs consistency checks with the proxy settings on the NSX manager and automates proxy configuration in NSX manager if a proxy config doesn’t exist in the NSX manager. The other enhancements are around NAPP scaling mainly:
- Supports up to 5 NAPP instances per automation appliance (under the same supervisor cluster).
- Supports scale up to 15 TKGS worker nodes
- Improved automation support for self-signed and private certificates for offline deployments using Harbor registry
- Reintroduced Evaluation form factor (which is a good thing for lab / POC activities)
In this two-part blog series, we will set up an HTTPS web proxy server, deploy and configure NAPP to use the web proxy, and discuss options to modify proxy settings post NAPP deployment. Here is the breakdown:
Part 1 : Covers the deployment and configuration of an HTTPS web proxy that we will use with NSX and NAPP
Part 2 : Covers NAPP configuration with the HTTPS web proxy and guidance on modifying proxy settings post NAPP deployment.
Let’s get started:
Just FYI – If you would like to check out my previous articles on NSX application Platform, please scroll down to the bottom of this article under the References section where I have provided links to manual and automated deployments.
Table of Contents
Considerations on using NAPP automation appliance for NAPP deployment with Proxy support
- Only one proxy settings can be defined in the NAPP automation appliance UI, and that will apply to all NAPP instances deployed using the UI. If we have a custom requirement to deploy multiple NAPP instances with different proxy settings, we should use the NAPP appliance CLI for the NAPP deployment. A typical example would be with a VCF environment having multiple workload domains for prod and non-prod, each with separate proxy settings for monitoring and inspection.
- NAPP automation appliance automates the proxy configuration on the TKGS guest cluster for NAPP. Same proxy settings need to be used on the NSX Manager and it’s corresponding NAPP instance.
- NAPP automation appliance performs consistency checks for the proxy settings on the NSX manager cluster to make sure that both NSX and NAPP are using the same proxy settings.
- NAPP automation appliance can configure the proxy settings on the NSX manager cluster if a proxy configuration is not present.
Deploying and configuring the web proxy
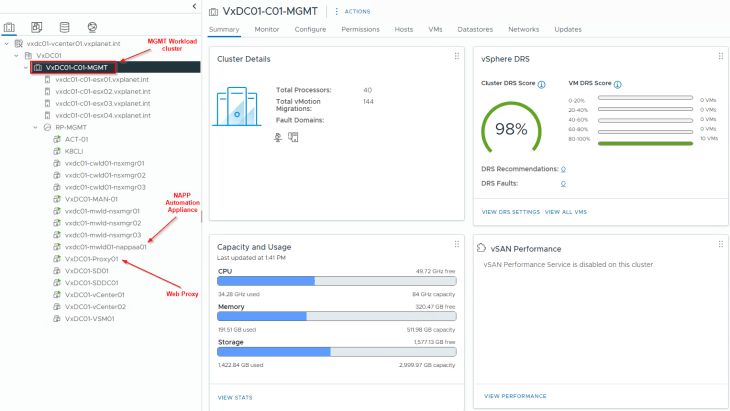
For this blog post, we have a consolidated management and compute vSAN cluster ‘VxDC01-C01-MGMT’. NAPP Automation Appliance 4.2 is deployed on the management network alongside vCenter and NSX manager cluster. We also have a web proxy server deployed on the same management network to be used for NAPP.
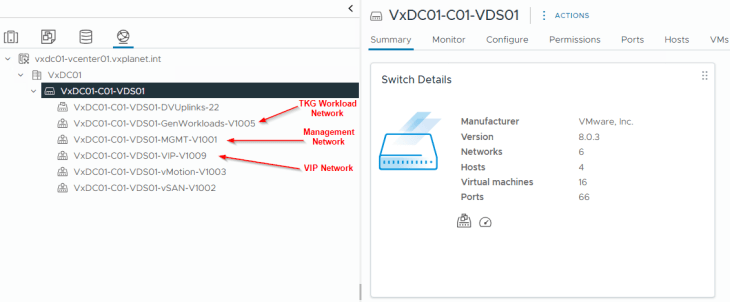
The network details for NAPP are similar to the previous articles. NAPP deployment requires three subnets and we have the below networks defined:
- Management network – VxDC01-C01-VDS01-MGMT-V1001 on 172.16.10.0/24
- Workload network – VxDC01-C01-VDS01-GenWorkloads-V1005 on 172.16.50.0/24
- VIP network (Frontend) – VxDC01-C01-VDS01-VIP-V1009 on 172.16.90.0/24
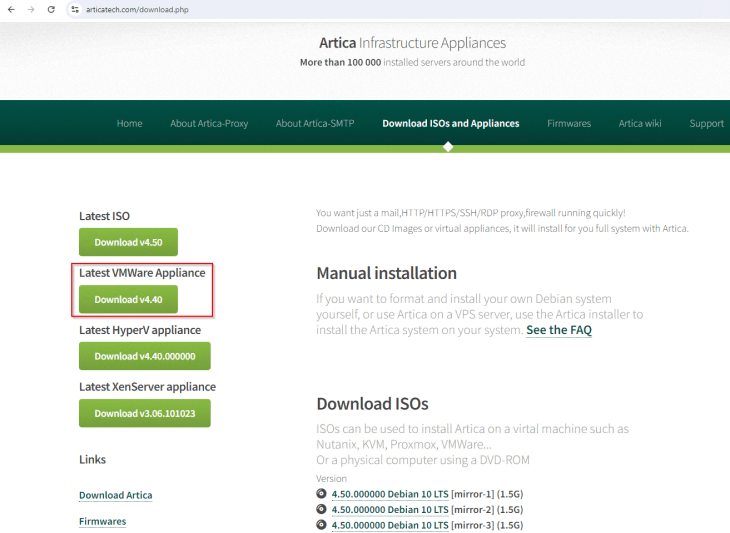
The web proxy that I am using is a trial version of Artica Proxy at https://www.articatech.com/. I found it suitable for my lab purpose due to it’s integration with Mikrotik routers (which is my lab router) and also it’s web filtering and SSL inspection capabilities. It’s available for download as an ova appliance and is deployed the same way as any other ova appliances.
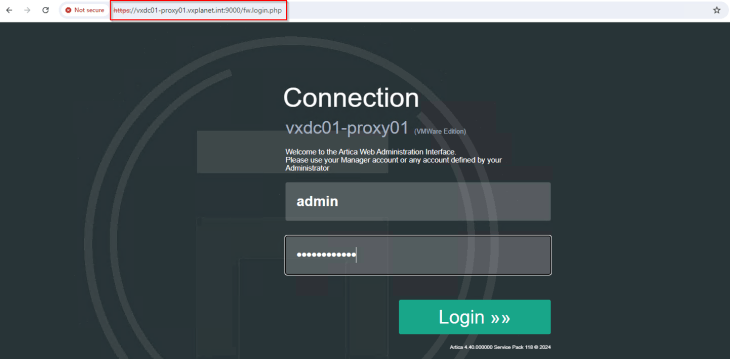
Once the appliance is deployed and the basic configuration is done, the appliance WebUI will be accessible on port 9000. Let’s login and configure the proxy service.
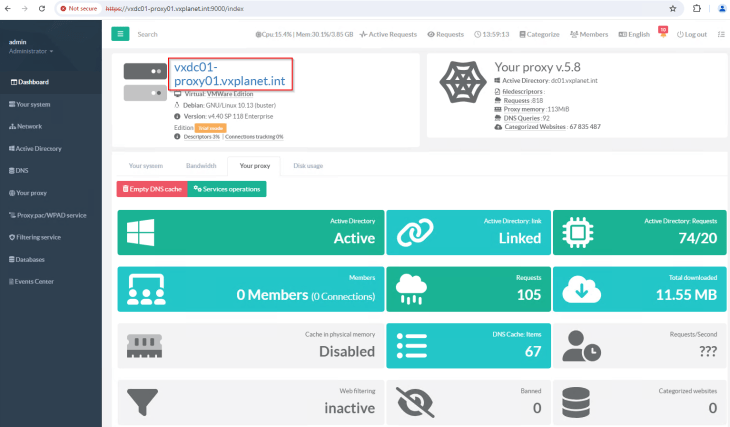
The first thing to do is to configure certificates for the HTTPS proxy listener and SSL decryption. We require a SAN certificate for the HTTPS proxy listener, and optionally a CA certificate for enabling SSL inspection. We can generate both under the Certificates Center (we will use self-signed certificates for this blog post).
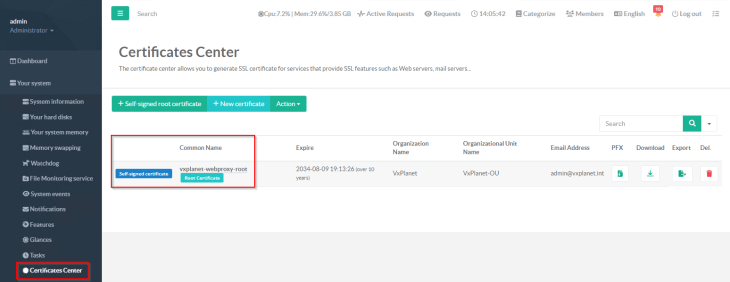
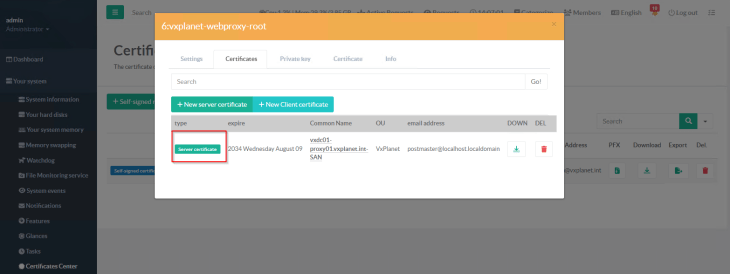
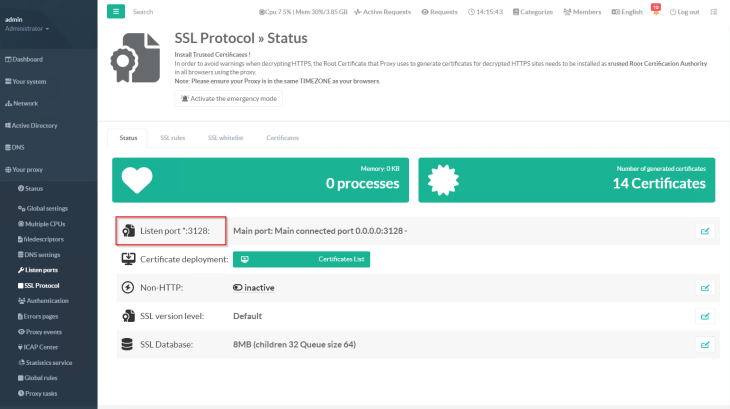
Now the proxy listener needs to be configured. We will use port 3128 as the HTTPS listener port and associate the SAN certificate generated previously.
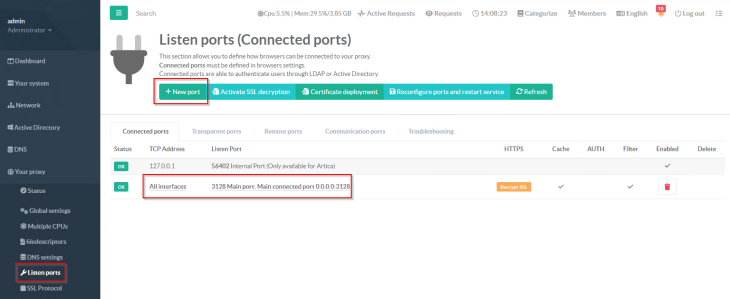
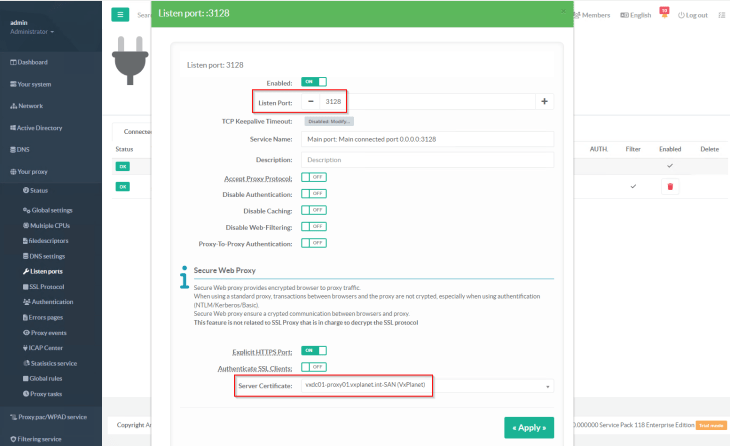
Optionally, we will also enable SSL inspection on the listener which I can use for other use-cases. SSL inspection feature uses the CA certificate to generate proxy certificates as and when SSL decryption happens.
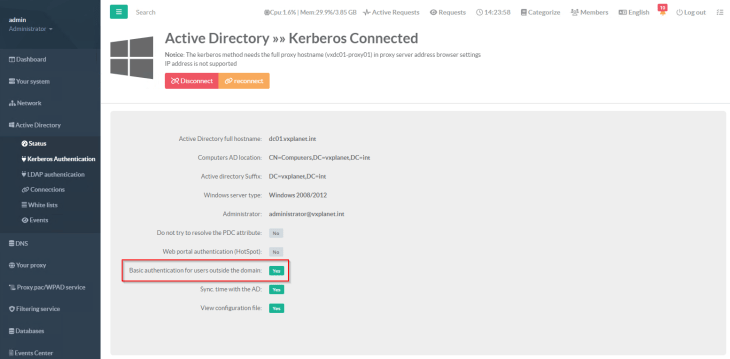
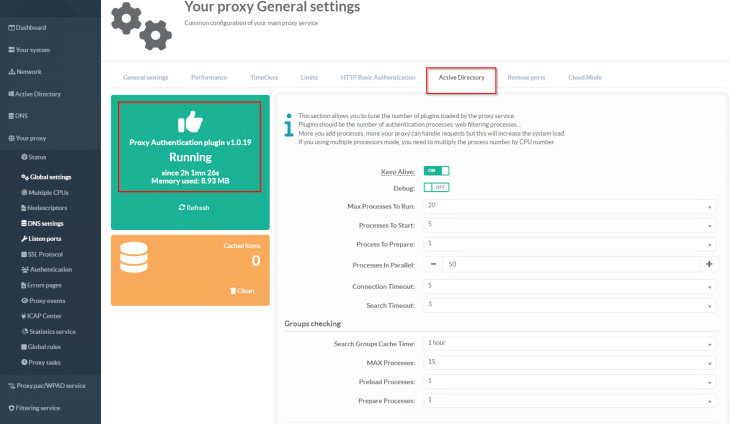
Next, we will configure a directory service (Microsoft Active Directory, in our case) to allow proxy authentication for web requests. For machines outside of AD domain, we will enable basic authentication.
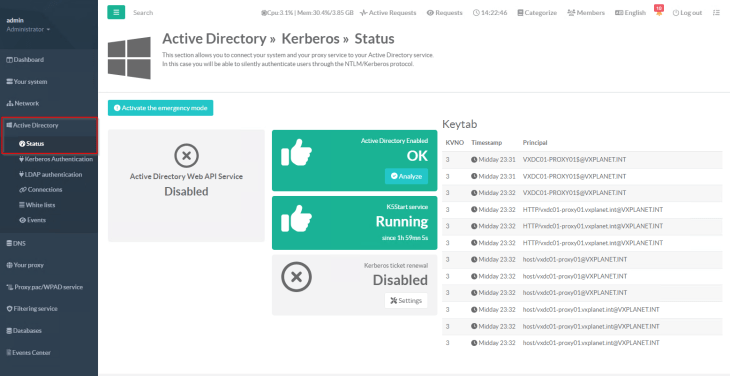
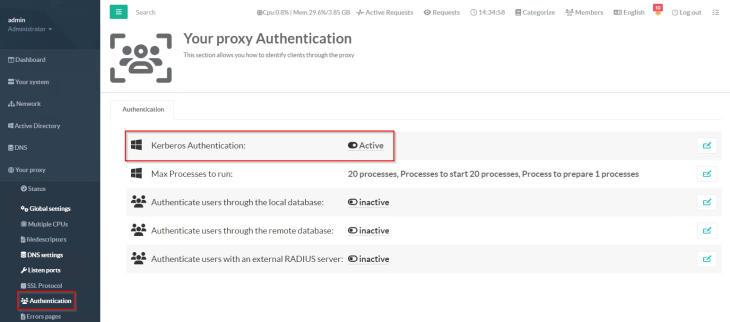
and we will confirm that the Kerberos proxy authentication plugin is in running state.
Verifying Proxy access from a client machine
Next, we will configure the HTTPS proxy settings on a client machine and confirm that it can access web services through the proxy. To do that, we need the proxy CA certificate to be downloaded and imported to the trusted certificate store on the client machine (as we are using HTTPS proxy).
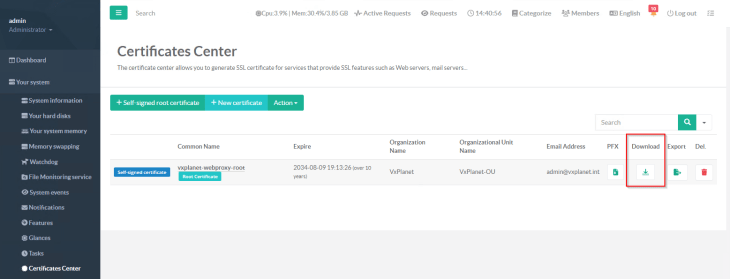
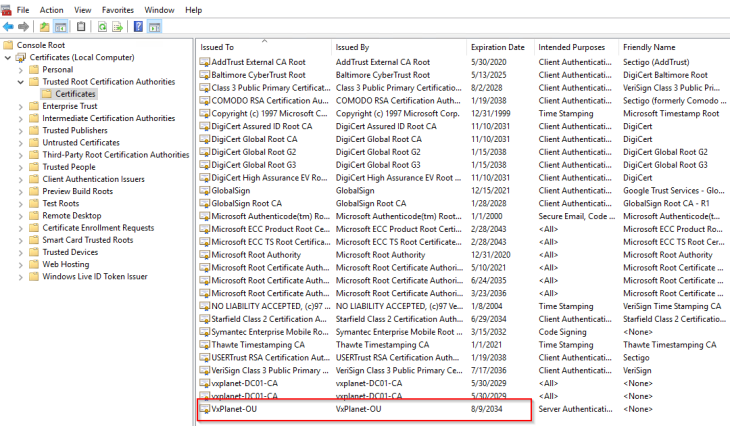
Let’s open a chrome browser with the HTTPS web proxy settings, and access our website https://vxplanet.com . Because this client machine is domain joined, it uses integrated Kerberos authentication and doesn’t prompt for credentials.

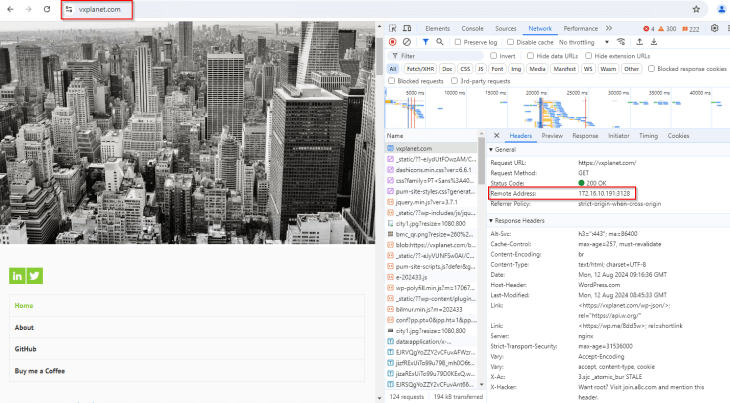
SUCCESS!!! We see that the web content is accessed over the Artica Proxy server.
Configuring Proxy settings in NSX Manager
We first need to import the Proxy CA certificate to the NSX trusted CA store.
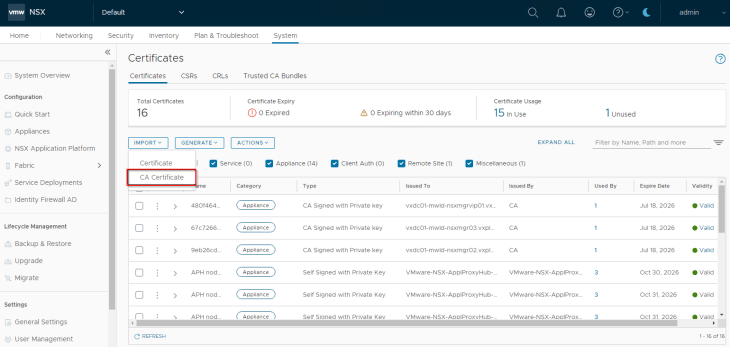
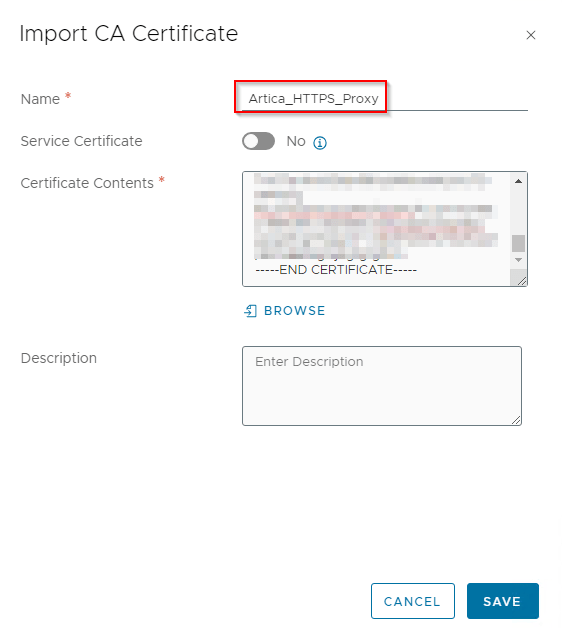
Now let’s configure proxy settings under System -> General Settings -> Internet Proxy Server
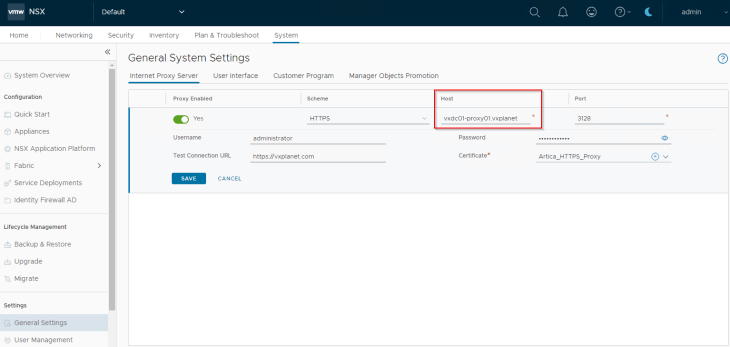
If NSX manager can successfully access the test URL over the HTTPS proxy, we should see that the proxy settings get saved.
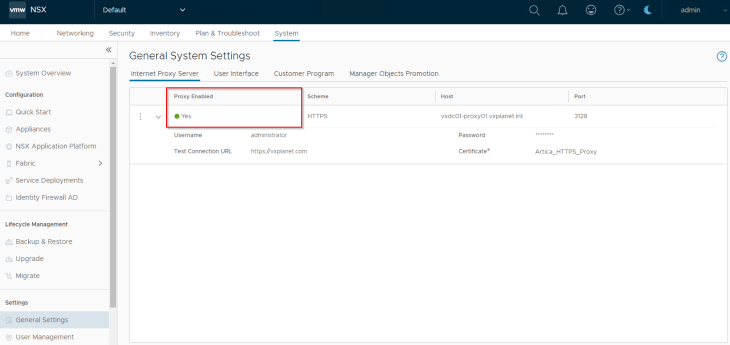
Excellent!!! We are now done with Part 1, and in the next article we will deploy NAPP with the configured HTTPS web proxy using the NAPP automation appliance.
Stay tuned!!!
I hope the article was informative. Thanks for reading.

Continue reading? Here are the other parts of this series:
Part 2 : NAPP with Proxy deployment
https://vxplanet.com/2024/08/23/nsx-application-platform-deployment-with-an-http-https-web-proxy-part-2/
References
NAPP automated deployment using NAPP-AA
NAPP manual deployment with VMware AVI load balancer

