In web hosting, virtual hosts allow a single server to host multiple domains. Apache, one of the most widely used web servers, provides robust virtual hosting capabilities.
On RHEL 9 and RHEL-based distributions such as Fedora, Rocky Linux and AlmaLinux, setting up and managing virtual hosts is straightforward, especially with the enable/disable options that make it easy to control which sites are active.
This guide will cover how to:
- Install and configure Apache on RHEL 9.
- Create virtual hosts for
example1.comandexample2.com. - Enable or disable the virtual hosts as needed.
Table of Contents
Step 1: Install Apache Web Server
If Apache is not installed on your server, install it using:
sudo dnf install httpd -y
After installation, start and enable Apache to run on system boot:
sudo systemctl start httpd
sudo systemctl enable httpd
Step 2: Configure Apache Virtual Hosts
To keep things organized, create directories to store website files for each domain. Apache usually uses /var/www/ as the default location for website files.
sudo mkdir -p /var/www/example1.com/public_html
sudo mkdir -p /var/www/example2.com/public_html
Set the correct ownership and permissions for these directories:
sudo chown -R $USER:$USER /var/www/example1.com/public_html
sudo chown -R $USER:$USER /var/www/example2.com/public_html
sudo chmod -R 755 /var/www
Create a simple HTML file for each domain to verify that the setup is working:
echo "<html><h1>Welcome to Example1.com</h1></html>" | sudo tee /var/www/example1.com/public_html/index.html
echo "<html><h1>Welcome to Example2.com</h1></html>" | sudo tee /var/www/example2.com/public_html/index.html
Step 3: Create Virtual Host Configuration Files
Apache looks for virtual host configurations in /etc/httpd/conf.d/ by default and each domain will need its own configuration file.
Create a Virtual Host File for example1.com:
sudo nano /etc/httpd/conf.d/example1.com.conf
Add the following configuration:
<VirtualHost *:80>
    ServerAdmin [email protected]
    ServerName example1.com
    ServerAlias www.example1.com
    DocumentRoot /var/www/example1.com/public_html
    ErrorLog /var/www/example1.com/error.log
    CustomLog /var/www/example1.com/access.log combined
</VirtualHost>
Create a Virtual Host File for example2.com:
sudo nano /etc/httpd/conf.d/example2.com.conf
Add the following configuration:
<VirtualHost *:80>
    ServerAdmin [email protected]
    ServerName example2.com
    ServerAlias www.example2.com
    DocumentRoot /var/www/example2.com/public_html
    ErrorLog /var/www/example2.com/error.log
    CustomLog /var/www/example2.com/access.log combined
</VirtualHost>
If you have a firewall enabled, make sure to allow HTTP traffic:
sudo firewall-cmd --permanent --add-service=http
sudo firewall-cmd --reload
Step 4: Enable and Disable Virtual Hosts
On RHEL, you can manage virtual hosts by enabling or disabling the configuration files.
To Enable a Virtual Host
Simply ensure that the configuration file is in /etc/httpd/conf.d/ and restart Apache:
sudo systemctl restart httpd
Both example1.com and example2.com will now be active.
To Disable a Virtual Host
If you want to temporarily disable a virtual host, you can rename the configuration file or move it out of /etc/httpd/conf.d/.
For example, to disable example2.com:
sudo mv /etc/httpd/conf.d/example2.com.conf /etc/httpd/conf.d/disabled_example2.com.conf
Restart Apache to apply changes:
sudo systemctl restart httpd
To re-enable it, move it back to the original location:
sudo mv /etc/httpd/conf.d/disabled_example2.com.conf /etc/httpd/conf.d/example2.com.conf
sudo systemctl restart httpd
Step 5: Test Apache Virtual Hosts
If testing locally, add the following entries to your /etc/hosts file:
127.0.0.1 example1.com
127.0.0.1 example2.com
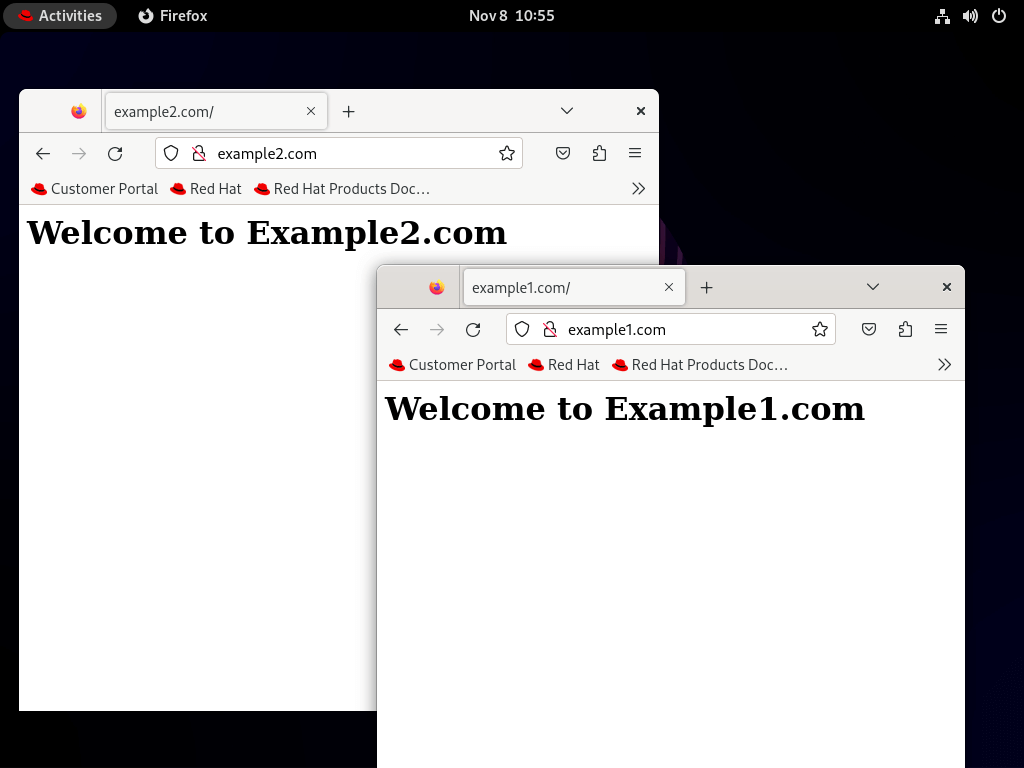
Open a web browser and go to http://example1.com and http://example2.com. You should see the corresponding welcome messages.

Conclusion
You have successfully created Apache Virtual Hosts on RHEL 9 for two domains, example1.com and example2.com, with the option to enable or disable each host as needed.
This setup allows your server to manage multiple websites independently and gives you control over which domains are active.


