If you manage a WordPress website, you’ll be very familiar with the WordPress dashboard, which is used for content creation, site maintenance, and administrative tasks.
However, many users feel that the default admin menu is cluttered, with many essential tools scattered, while less-used sections of the website consume valuable screen space.
This comprehensive guide will walk you through multiple strategies to take complete control of your WordPress dashboard menu. From simple drag-and-drop techniques to advanced custom coding methods, you’ll discover how to:
- Rearrange admin menu items with precision
- Hide unnecessary menu sections
- Create role-based menu experiences
- Implement custom menu orders using PHP
- Leverage powerful WordPress and plugin-based solutions
Whether you’re struggling with a cluttered dashboard, seeking to improve team workflow, or simply want a more personalized administrative experience, this guide will provide the tools and knowledge to transform your WordPress backend into a clean dashboard.
Let’s get started!
Rearranging your WordPress dashboard menu improves your administrative experience, as a cluttered interface transforms into a personalized, efficient workspace. This customization saves time and dramatically improves workflow.
This dashboard customization allows you to:
- Prioritize the tools and sections you use most frequently, bringing them to the top of the menu for instant access.
- Reduce cognitive load by organizing menu items in a way that makes logical sense to your specific workflow.
- Minimize the time spent hunting for specific settings or features.
- Create a more comfortable and personalized administrative environment that reflects your unique working style.
Once you modify your site menu according to your needs, content management, site maintenance, and administrative tasks become more intuitive. You’ll focus on creating content, not navigating a complex dashboard.
Suggested read: Protect Your WordPress Login pages with Cloudflare Zero Trust
So we know why you should re-order your menu items, now let’s see how to do this.
Start by navigating to your WordPress dashboard and clicking on “Plugins” in the left-hand menu, then select “Add New“, and use the search bar to find “Admin Menu Editor” by searching for the plugin name.
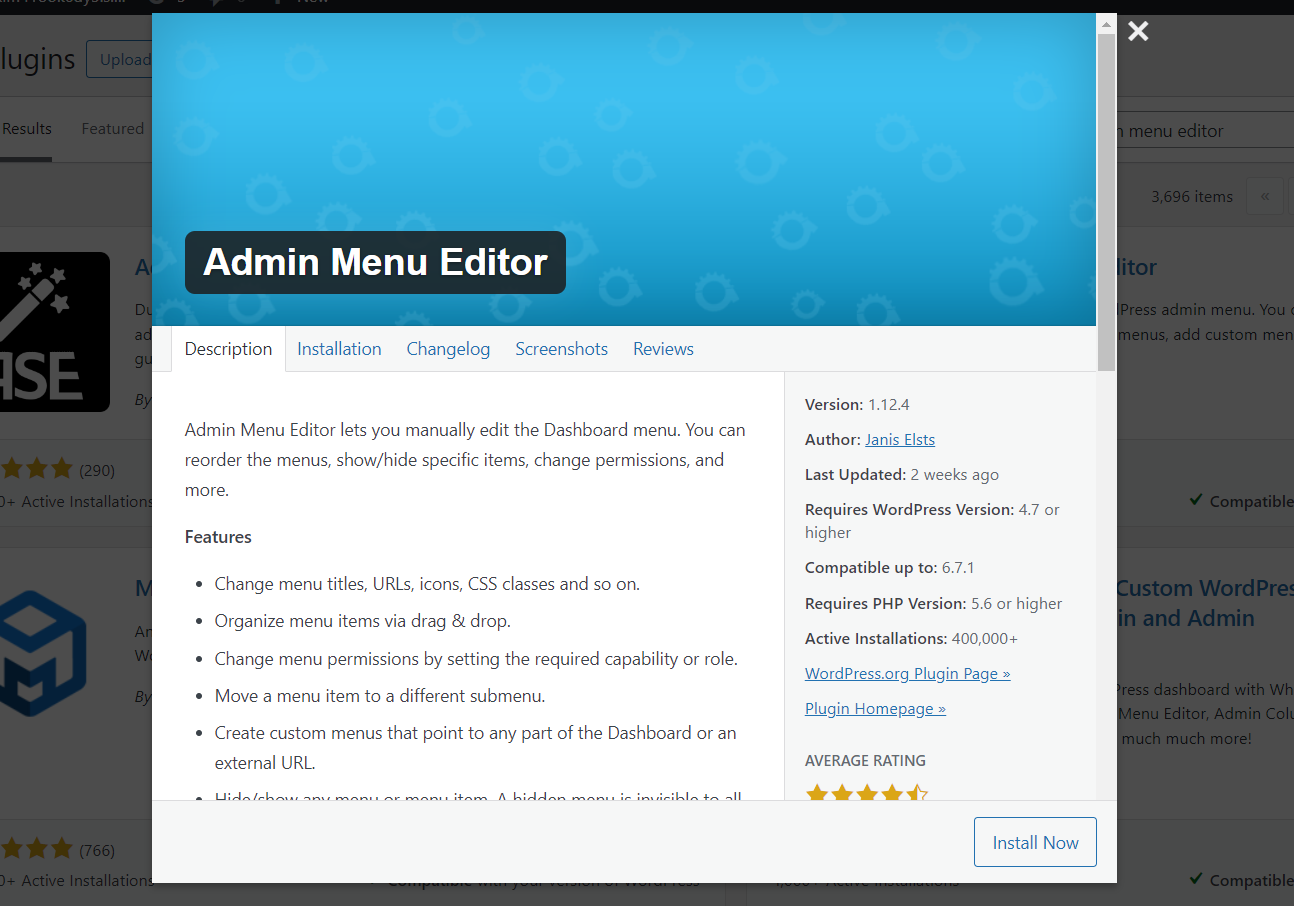
Click the “Install Now” button next to the plugin, and after installation, activate the plugin by clicking the “Activate” button. This will enable the menu customization features in your WordPress backend.
Suggested read: Everything You Need To Know About wp-config.php File
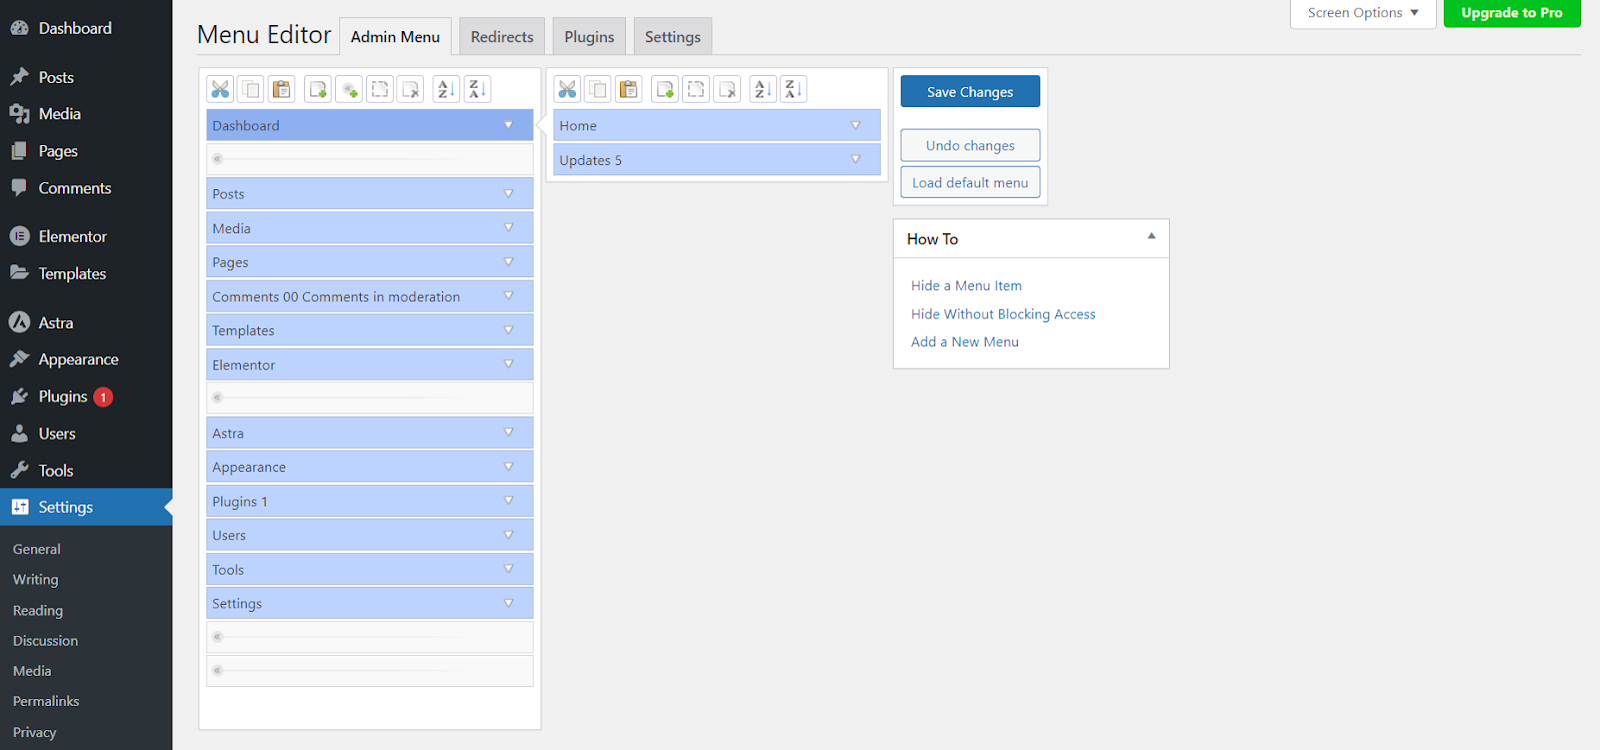
After activation, locate the new “Menu Editor” option that will appear in your WordPress dashboard sidebar and click on it to open the customization menu. On this screen, you’ll see a full representation of your current dashboard menu structure.
You can use the intuitive drag-and-drop functionality to reorder menu items by simply clicking and holding an item and then dragging it to your desired position. This allows you to prioritize the most frequently used sections and create a more personalized administrative experience that matches your specific workflow and preferences.
Suggested read: 10 Best WordPress Management Tools To Easily Manage Multiple Websites
Step 3 – Customize Button Actions
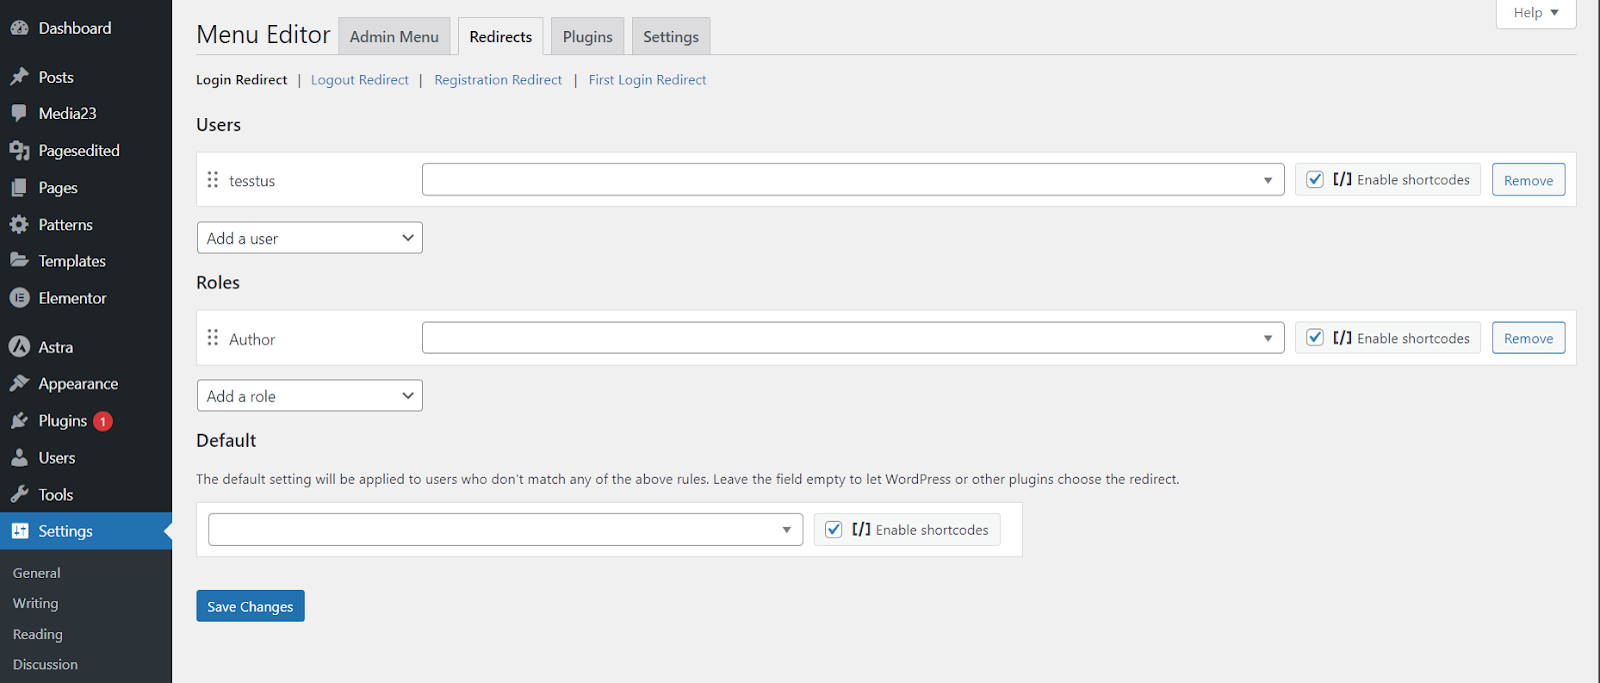
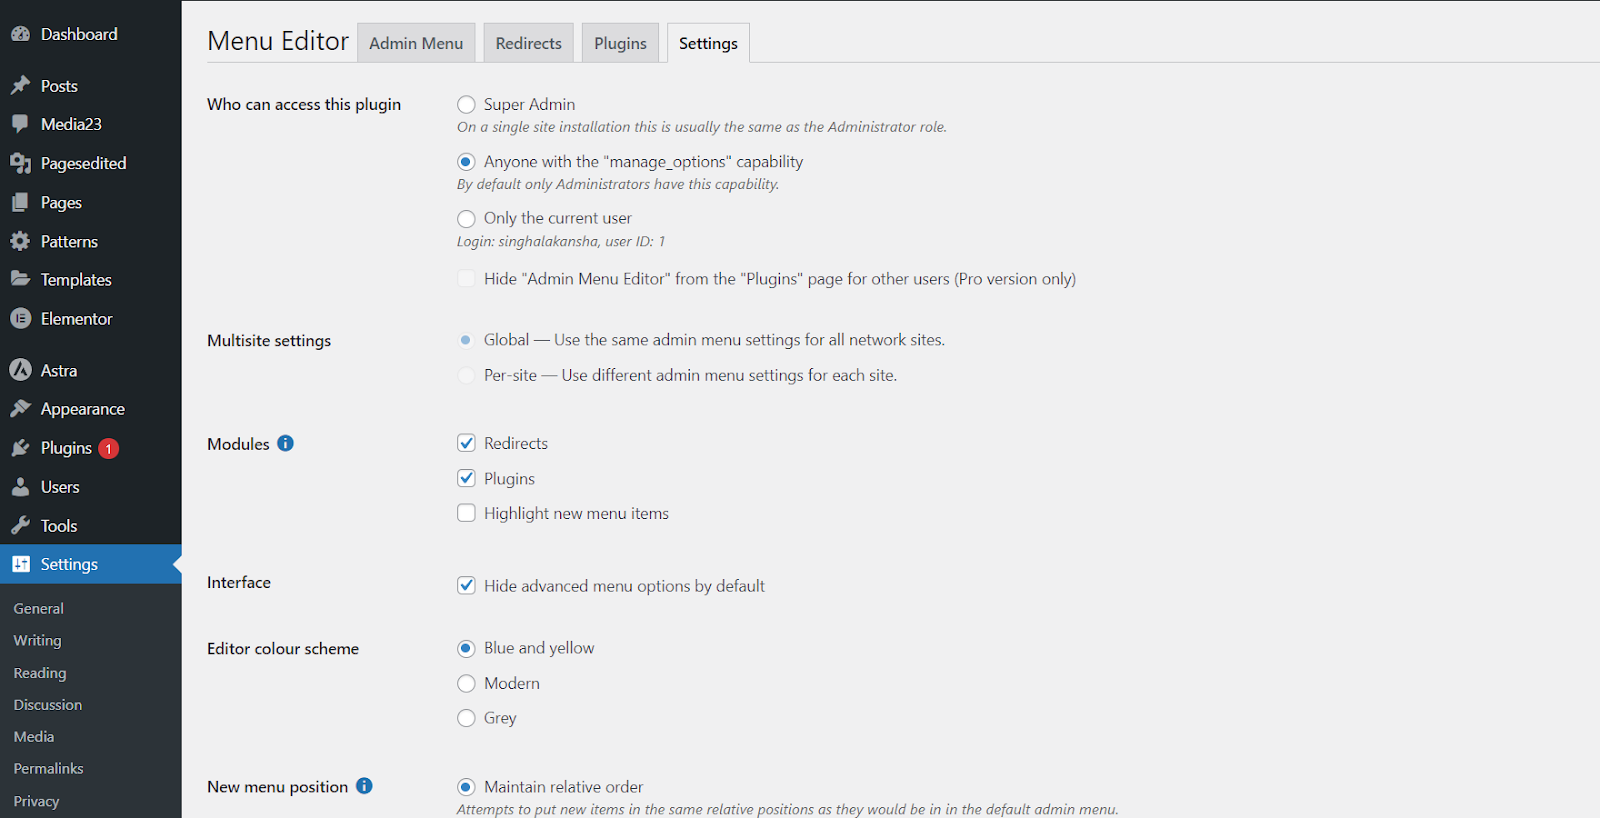
Admin Menu Editor provides features such as access control based on user roles, multisite settings management, and precise menu positioning. Administrators can use these features to create highly tailored dashboard experiences that enhance security, streamline workflow, and prevent unauthorized access to sensitive site areas.
For example, a large organization with multiple content creators could use these settings to ensure that writers only see post-related menus, and editors have additional publishing capabilities, while keeping critical settings like plugin management and site-wide configurations exclusively accessible to top-level administrators.
Additionally, the Admin Menu Editor’s debugging and error verbosity levels allow technical teams to troubleshoot menu permission issues efficiently. Its options range from minimal error reporting to comprehensive diagnostic information, making it invaluable for agencies managing numerous client websites.
Suggested read: How to Easily Optimize WordPress Website With RunCloud Hub
Method 2: Manual Theme File Editing (For Advanced Users)
If you prefer a more technical approach or can’t use plugins, you can manually edit menu items by modifying your theme’s functions.php file using custom PHP code. However, this is a technical method which is only recommended for advanced users as it requires:
- A good understanding of PHP
- Permission to edit the WordPress code directly
Step 1: Accessing the Theme Customization Files
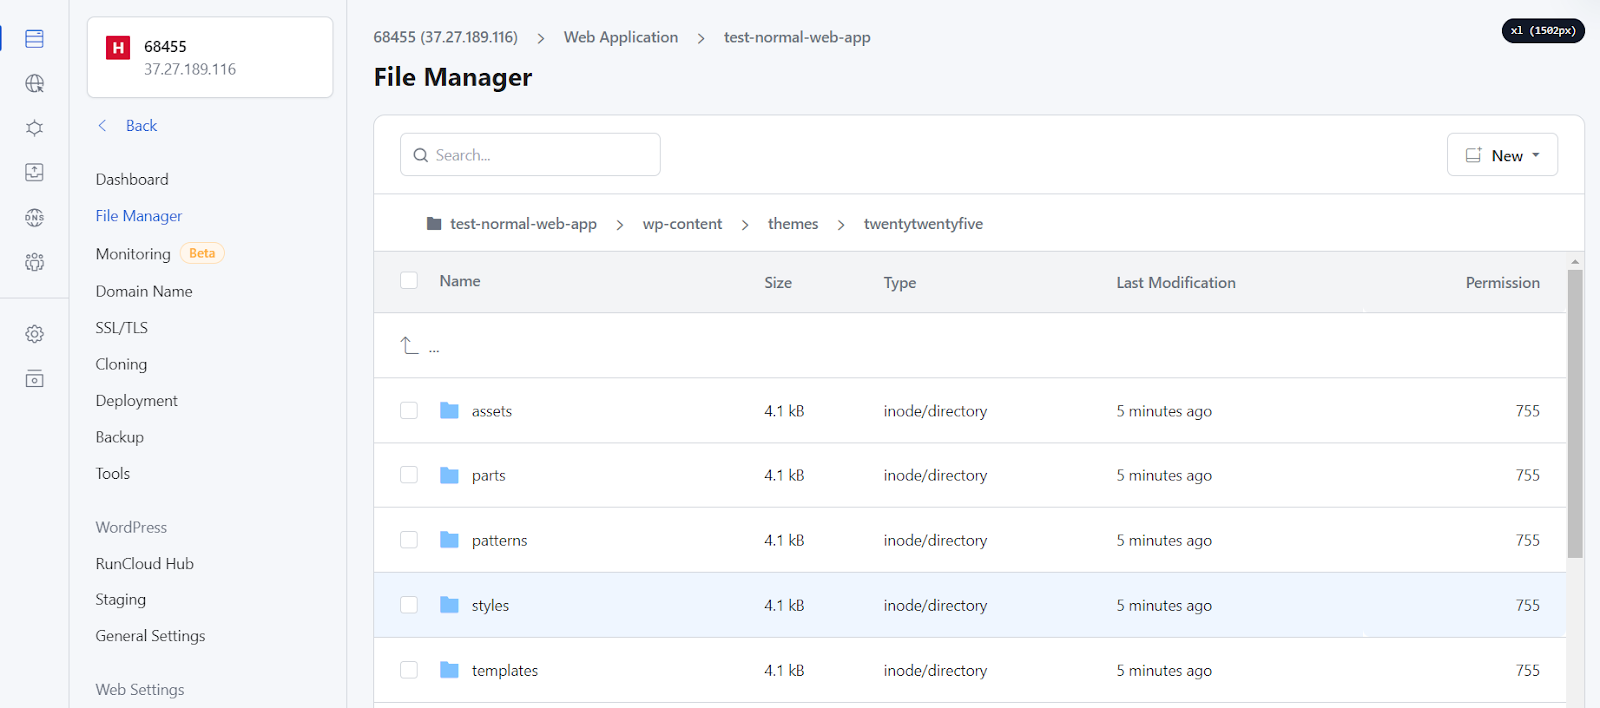
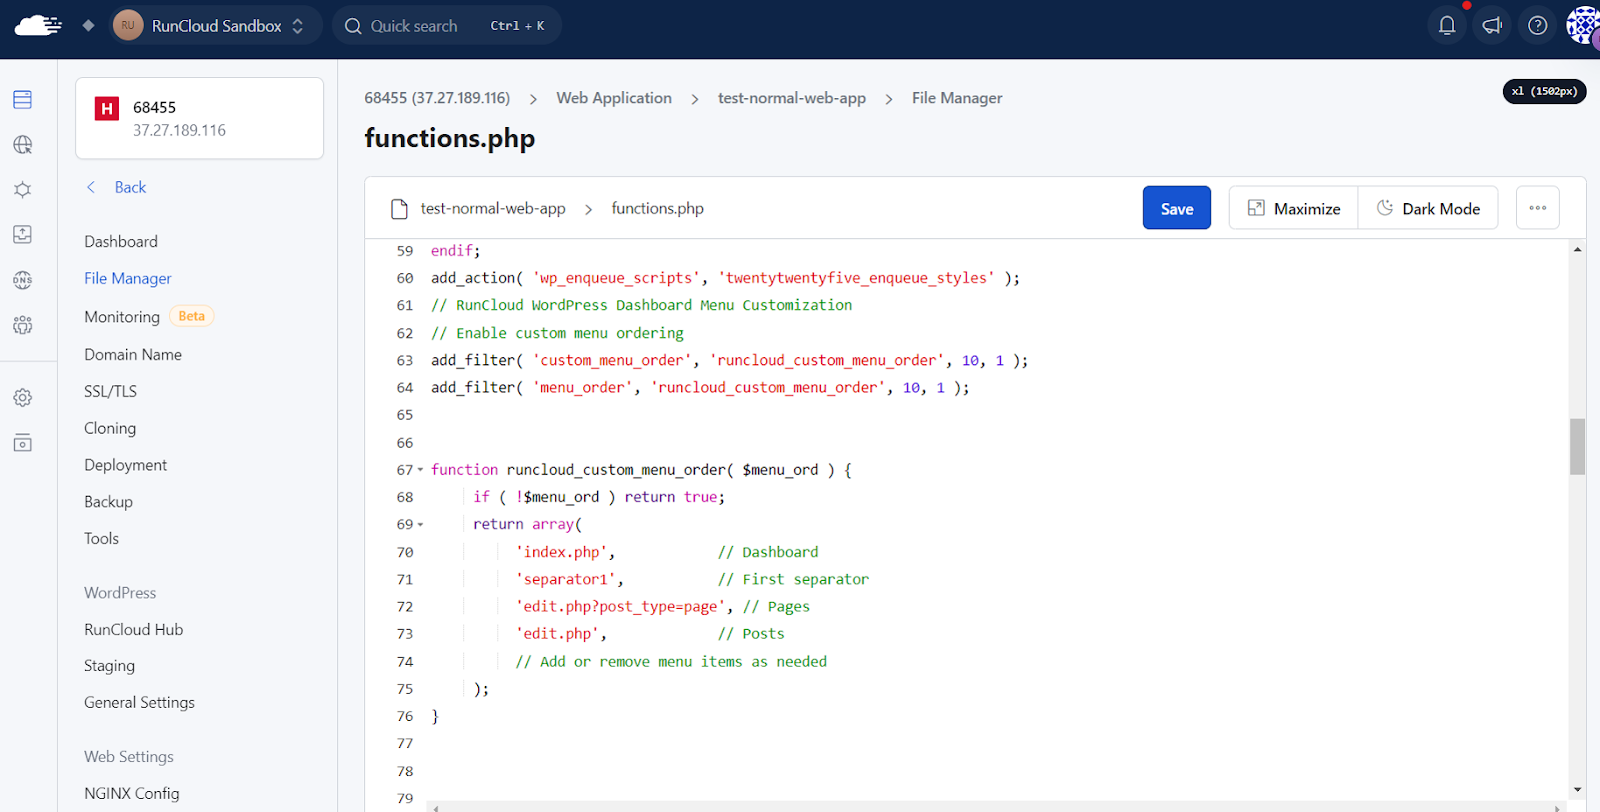
Open your RunCloud WordPress website’s theme directory, typically located in wp-content/themes/your-theme-name/, and locate the functions.php file using the file manager or via SSH connection. If you’re using a child theme (recommended), open the child theme’s functions.php file to ensure your customizations are not lost during theme updates.
Suggested read: The Complete WordPress Speed Optimization Guide
Add the following custom PHP code to your functions.php file to reorder the WordPress dashboard menu items:
// RunCloud WordPress Dashboard Menu Customization
// Enable custom menu ordering
add_filter( 'custom_menu_order', 'runcloud_custom_menu_order', 10, 1 );
add_filter( 'menu_order', 'runcloud_custom_menu_order', 10, 1 );
function runcloud_custom_menu_order( $menu_ord ) {
     if ( !$menu_ord ) return true;
     return array(
          'index.php',            // Dashboard
          'separator1',           // First separator
          'edit.php?post_type=page', // Pages
          'edit.php',             // Posts          // Add or remove menu items as needed
     );
}
Step 3: Save The Changes
After making the necessary changes to your functions.php file, you can save it and refresh your WordPress dashboard. The updated menu list will reflect on your dashboard immediately.
Advanced WordPress Dashboard Customization Techniques
WordPress provides a rich set of built-in functions that allow for even more sophisticated menu and page customization beyond basic ordering. Here are some powerful functions to further enhance your dashboard management:
- add_menu_page() enables you to create entirely new top-level menu items in the WordPress dashboard. It gives you complete flexibility to introduce custom administrative sections tailored to your specific website needs. This function allows you to specify the menu title, capability requirements, unique slug, and even a custom icon for your new menu item.
- The remove_menu_page() function allows developers to remove specific top-level admin menu items from the WordPress dashboard by providing the menu’s unique slug. By calling this function within the admin_menu action hook, you can selectively hide menu pages and customize sections in the WordPress admin interface.
- add_media_page() specifically allows you to add custom pages to the Media menu, which can be incredibly useful for creating specialized media management interfaces or implementing custom media-related functionality.
- add_meta() offers a programmatic way to add custom metadata to posts, which can be particularly helpful for creating advanced content management systems or implementing complex editorial workflows. This function allows you to dynamically attach additional information to your WordPress content that can be used for filtering, sorting, or displaying extra details.
- add_menu_classes() enables fine-tuned control over the CSS classes applied to top-level administration menu items, allowing you to customize the visual presentation and behavior of your dashboard navigation. This function is particularly useful for advanced theming and creating more intuitive administrative interfaces that match your specific design requirements.
Wrapping Up
In this guide, we have provided you with steps to modify and customize your WordPress dashboard. However, when implementing dashboard menu customizations, you should always test your modifications in a staging environment to ensure they don’t disrupt your website’s functionality or user experience.
If you are using RunCloud, you can simply do this by using our one-click staging feature. RunCloud also makes WordPress installation and updates incredibly straightforward, allowing users to manage complex web infrastructure with remarkable ease.
What truly distinguishes RunCloud is its atomic deployments functionality, which allows you to create version-controlled WordPress development. You can use this to create staging sites for risk-free testing of customizations.
Master your WordPress sites with RunCloud! Start your FREE RunCloud trial today
How do I organize my WordPress dashboard?
Organizing your WordPress dashboard is straightforward and can significantly improve your site management efficiency by allowing you to rearrange menu items to your preferred order. WordPress provides intuitive built-in functionality that lets you customize the menu layout by creating custom child themes with PHP code to prioritize the most frequently used sections and create a more personalized administrative experience that aligns with your specific workflow and needs.
Can only the admin access the WordPress dashboard?
WordPress provides multiple levels of dashboard access through its robust user role management system, with the primary administrator having full control, and other roles such as editors, authors, and contributors receiving limited or specific access to dashboard features. The default WordPress user roles are carefully designed to provide granular permissions, ensuring that each team member can access only the sections and functions relevant to their responsibilities, which helps maintain site security while allowing collaborative content management.
Customizing your WordPress dashboard menu can be achieved through several methods. Firstly, you can use the “Admin Menu Editor” Plugin in WordPress to use its menu personalization options. Alternatively, advanced users can also use custom code to create a completely tailored dashboard experience. This allows you to not just reorder menu items but also hide, rename, and precisely control every aspect of your administrative interface for maximum efficiency and user-friendliness.

