Have you ever wanted to zoom the screen recording area to where your cursor currently is? OBS can do it for you with the help of third-party scripts. You don’t need a dedicated video editor in Linux just for zooming into an area.
Before starting this guide, let’s make sure you have OBS Studio installed on your system.
Table of Contents
Step 1: Download Zoom to Mouse Lua script
Now that you have installed and set OBS Studio, let’s see how to set the Zoom to mouse feature. First, you need to download the “Zoom to Mouse” Lua script.
Use the link below to go to the GitHub repository of the project.
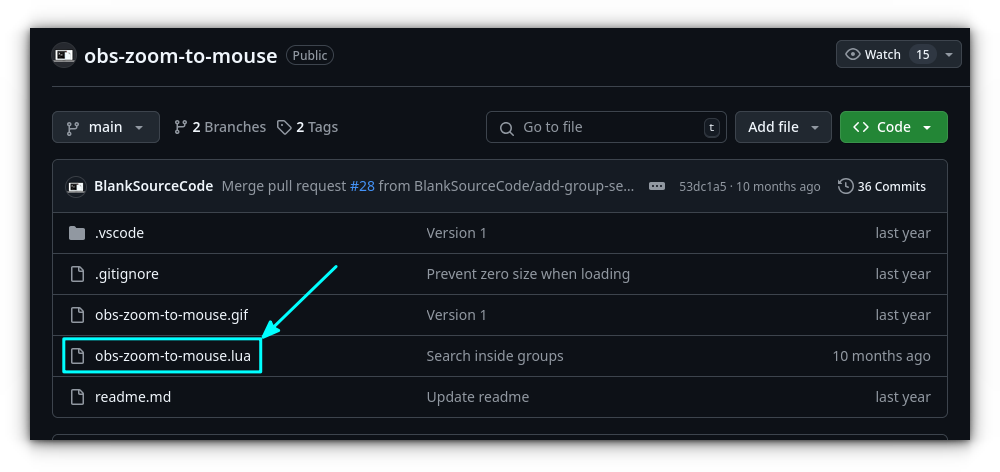
In this repository, click on the obs-zoom-to-mouse.lua Lua script file link.
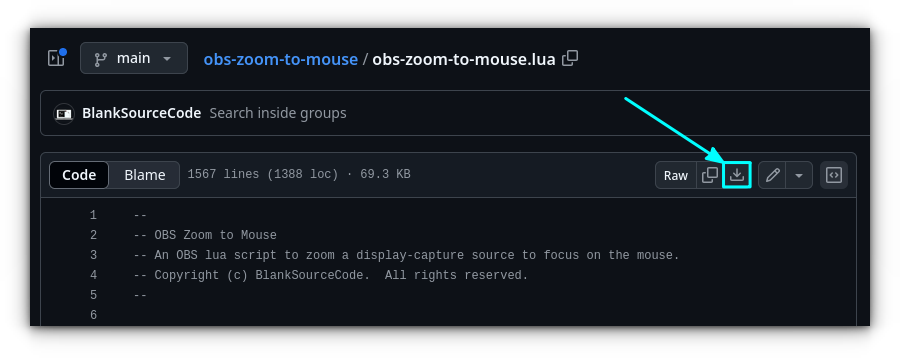
On the code page, click on the download button available on the top-right.
Step 2: Install the lua script in OBS
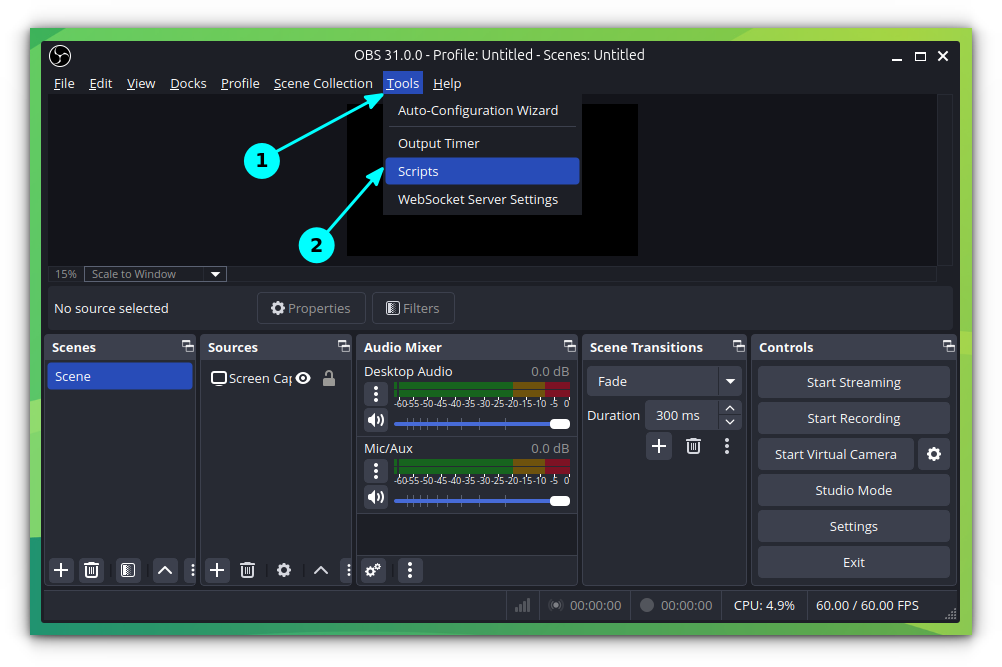
Open OBS Studio and select Tools → Scripts.
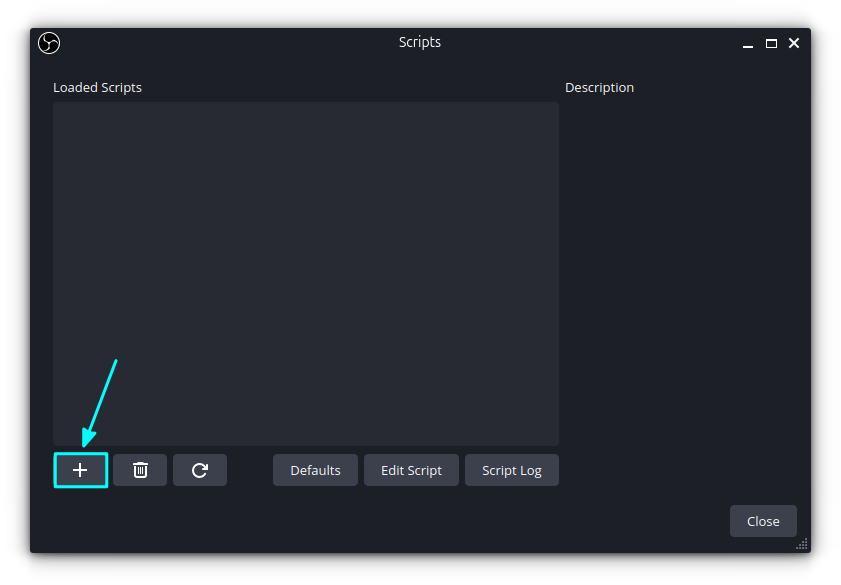
In the scripts window, click on the “+” button in the bottom-left, as shown below.
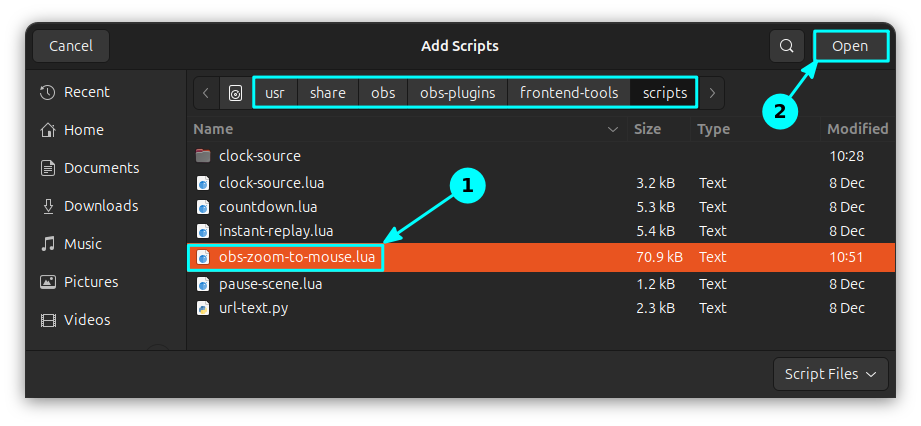
This will open a file chooser, where you can see the location of the scripts. For me, it is /usr/share/obs/obs-plugins/frontend-tools/scripts.
🚧
This location may vary according to the OBS Studio installation method (deb, snap, flatpak etc_. Replace the location according to your method of installation.
You need to copy the downloaded Lua script file to this location.
For this, open a terminal. Now, assuming you have downloaded the Lua script to the ~/Downloads directory, use the command:
sudo cp ~/Downloads/obs-zoom-to-mouse.lua /usr/share/obs/obs-plugins/frontend-tools/scripts
Now, you can see this script appear in the Scripts dialog we have opened earlier. Click on it and select Open.
This will open the script settings. Here, you need to select a Zoom Source. This should be the same as the screen capture source.
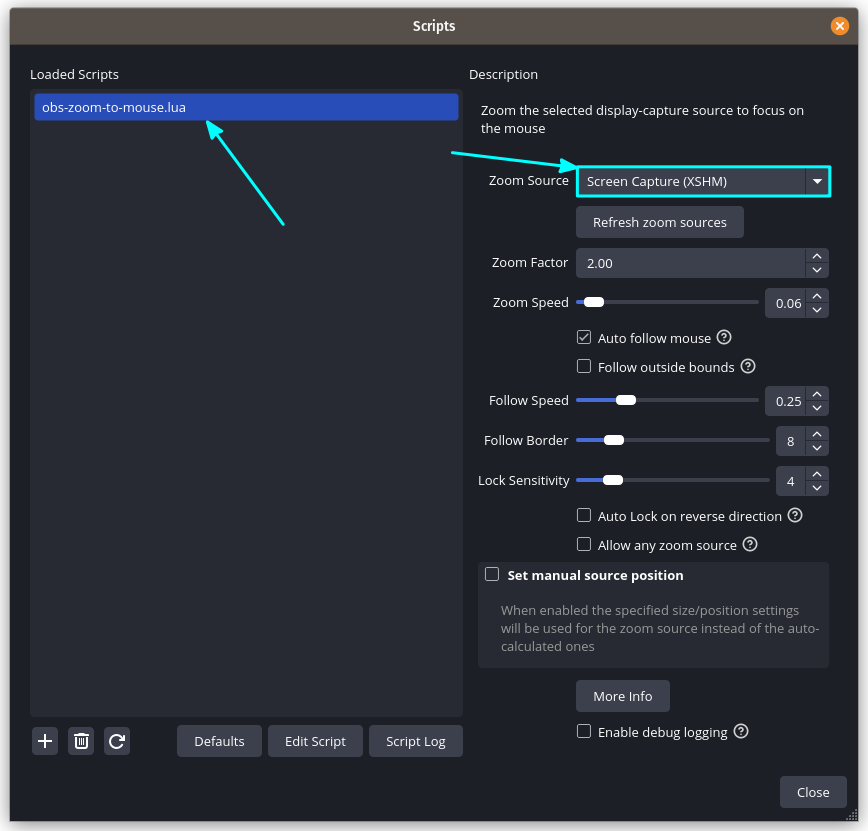
You can go through the rest of the settings for further tweaks.
Step 3: Set a hotkey for Zoom
Now that you have installed the Zoom to Mouse script, you should set a hotkey for this action. Otherwise, it will be difficult to access this feature.
On the main menu of OBS Studio, click on File → Settings.
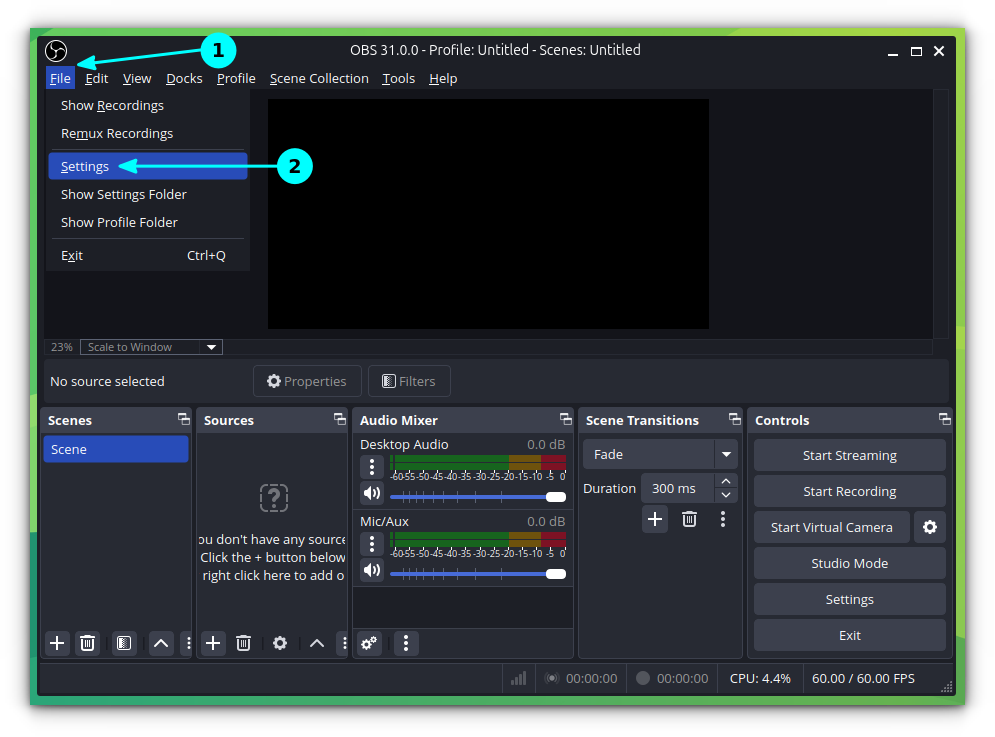
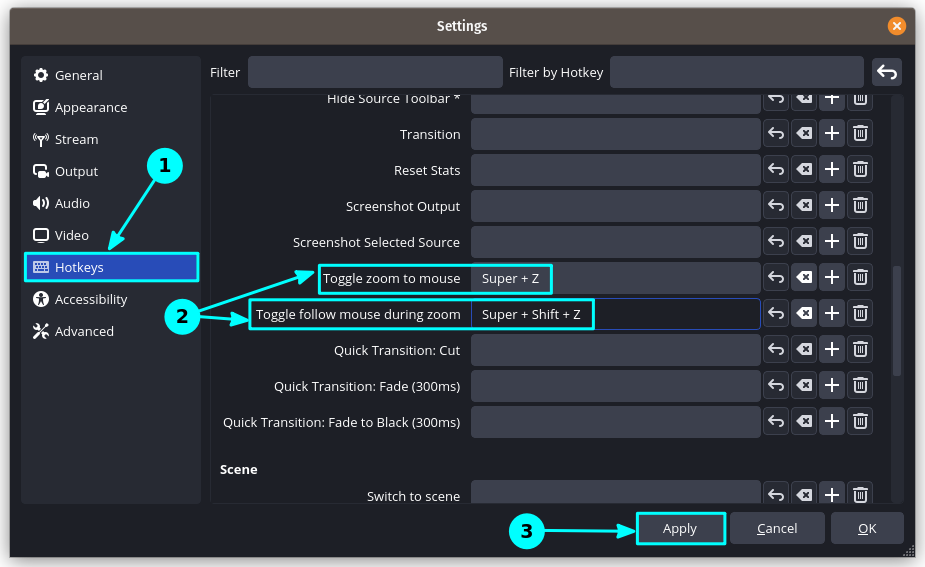
In the settings window, go to Hotkeys. Here, scroll down a bit to get the Toggle zoom to mouse and Toggle follow mouse during zoom shortcuts.
- Toggle zoom to mouse: Toggle between zoom and normal views.
- Toggle follow mouse during zoom: Decides whether the zoom follows the cursor, or lock in the current position. If locked, the other part of the video won’t be visible if the cursor is out of the zoomed location.
In the field corresponding to these options, press your required shortcuts.
🚧
You should not be adding hotkeys that have other preset values in the system. For example, setting a key like CTRL A will cause issue since this is the shortcut to select all items in the supported windows. Use some obscure shortcut which is not common.
Once set, click on Apply and close the settings windows. Now restart the OBS Studio and enjoy zooming in and out.
Enjoy OBS Studio for screen recording in Linux.

